

In this article:
- Itinerary + Context of My Trip to Uganda
- Luggage To Take to Uganda
- Clothes
- Shoes
- Travel Gear
- Camera Gear
- Bush Bathroom Breaks
Not JUST for Petite Women: Even though the title of this article states that it’s especially for petite women, this article is applicable to all women. I call out petites and make product recommendations accordingly because I’m petite (4’11”) and finding clothes and shoes that are not in the kids section can be challenging.
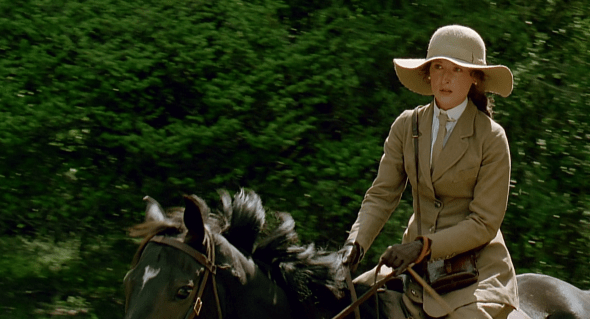
Whenever I start packing for a trip to Africa I always imagine that I’m going to look like Meryl Streep from Out of Africa…but in reality I look pretty much the same as on any other day…so not wearing a glamorous safari suit with perfect makeup and a dainty safari bag that’s too small to hold anything that happens to come with perfectly matching gloves.
{Summary Of My Trip To Uganda For Your Context}
Time of Year. Before I dive in, I want to provide you some context about our trip. I went to Uganda from mid-to-end-of September 2018…a total of 2 weeks including travel to and from Uganda. June through September is considered peak season and maybe even into the early part of October. In November the rainy season starts, so demand decreases significantly, along with prices.
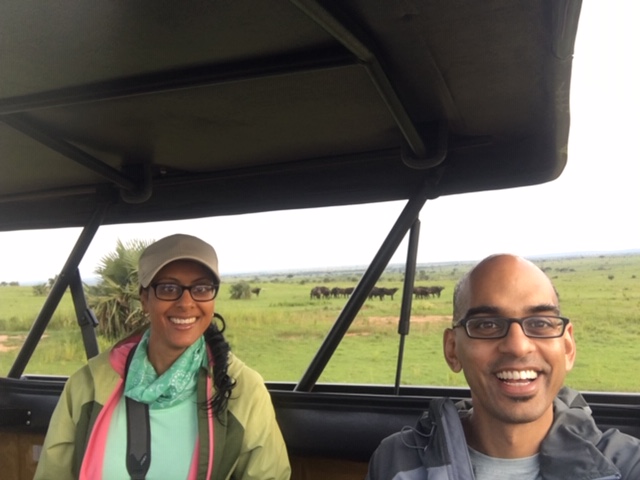
Travel Partner. I was traveling with my husband, so in terms of packing, there were some things I could rely on him to carry such as our binoculars while I carried the DSLR.
Itinerary. We flew into Entebbe and spent one night there and then our itinerary included Murchison Falls, Fort Portal, Bwindi Impenetrable Forest – in that order.
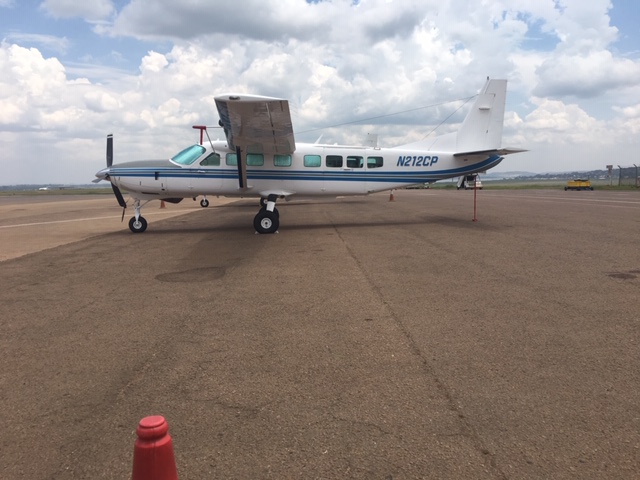
Transportation In Country. We flew within Uganda instead of driving. With only two weeks including travel to and from Uganda, we wanted to maximize time to see and do things. Flying shaved off several hours of getting to each destination. And it meant our travel days were activity days too. For example, because we flew from Murchison Falls to the airstrip closest to Fort Portal, we were able to do a morning game drive before catching our flight. We wouldn’t have been able to do that had we driven. Plus we got some sweet views from the planes.

That said, domestic flights in Uganda are not cheap – in fact they were quite expensive. So understandably most people opt to drive. For us, driving to each destination would have added 3-4 days to our trip as some of the drives have to be split over 2 days as the distances are too great. Those were days we didn’t have. Plus the Ugandan roads are known for being very bumpy (they were!).
Driving vs. Flying Within Uganda. Some might say the experience of driving is in itself fabulous. And I’m just going to keep it real here and say that’s a matter of perspective. If you’ve never been to a poor or underdeveloped country then I think that experience will undoubtedly be eye opening. My husband and I are of Indian background. While we weren’t born and raised there we’ve both been there many many times to visit family. So that experience is not new, nor eye opening for us. As a matter of fact in Uganda, while we were driving from the airstrip to our lodge which could take anywhere from 1-2 hours, we kept saying to each other how much it reminds us of India.
I hope that providing this context helps. When providing tips and advice I think it’s really important to understand where the person is coming from so that you can put the info in this article into perspective for yourself.
{A Few Important Notes}
Scroll down to the packing list: For anyone that’s just looking for a packing list without the detailed product info and specific product recommendations, just scroll all the way down. For everyone else, keep reading.
Lots of info: This article not only contains a general packing list, but at the bottom, there’s also separate list of what to wear and pack in your daypack for chimp and gorilla trekking specifically. The last thing you want is to have lugged all this awesome gear with you and then forget to pack something in your daypack for your adventure.
No paid promos: I’m not getting compensated in any way for anything in this post; nor was I asked to include or exclude any products. Everything in this post is based on my personal experiences, observations, and recommendations.
Balancing buying new gear: A trip to Uganda is already pretty $$$. So there’s a balance between buying new gear or not. I chose to buy gear, but I know I will use it again. I read articles where people wore bright colors, dark blue, black and jeans and had really wonderful bug-free trips!
Before and after experience: I published this post BEFORE actually going on the trip. After I get back, I’ll post updates with any notes about what I would/wouldn’t do differently. I like posting the before and after of my trips because you’re probably reading this before you go on your trip too. So like me, in this moment right now, you’re gathering info and will make decisions that are best for you to plan your own trip. I also made my decisions based on what I read from others.
Ok, now that we got all of that out of the way, let’s talk about the fun stuff!

{Luggage}
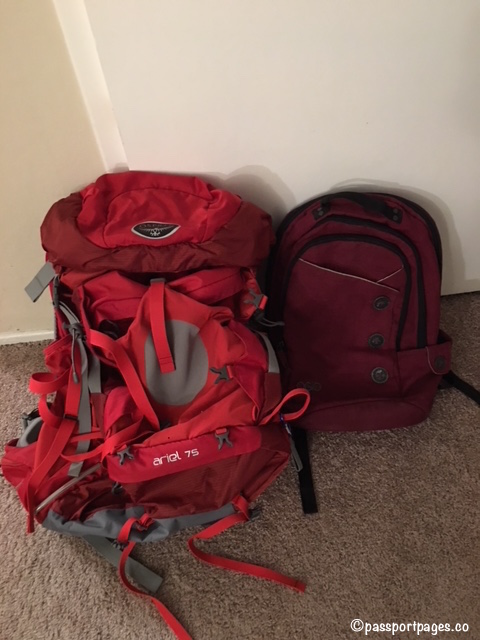
I took two pieces of luggage: an Osprey Ariel 75L backpack as my checked bag and Ogio Soho backpack as my day pack– and these luggage items and amount of luggage were perfect. Traveling with a suitcase would have been challenging as it’s difficult to roll them on the uneven pavements you’ll encounter, not to mention the stairs you’ll climb at your lodges. Most importantly, since we flew to each destination within Uganda the small airplanes only accommodate soft bags. At our lodges there was usually a staff member who carried our luggage for us for check in and check out but regardless, in my opinion backpacks are the way to go.
I love my Ogio Soho backpack. It has a lot of carrying capacity, comfortable and pockets to stay organized. This is a good video demo of this backpack.
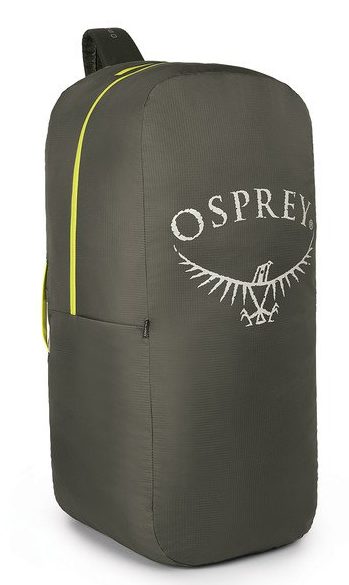
DO NOT forget to get an airporter cover for your checked backpack. All of those straps and hardware will be much more protected from airport machinery and getting tossed around. It’s a zippered bag that fits around your backpack. I recommend getting the same size Airporter size as your backpack for a snug fit. Originally I bought a Medium size Airporter for my small bag – one size up – thinking that once the bag was full that would be necessary. It wasn’t. There was a ton of excess fabric.
I got my Airporter from REI but you’ll find it on the Osprey website (or manufacturer of your backpack) and Amazon. It cost around $40 and came in the same sizes as the backpacks are sold.
The way we used them was we carried our backpacks to the check in line at the airport. And once we were in line, we put the backpacks in the Airporter so that by the time we were at the front of the line we were all set. Similarly we removed the Airporters once we got our bags from baggage claim. They fold up pretty small and we stored each in the bottom pocket of our backpacks. When you’re investing $100-$200+ on a backpack, it’s worth it to have this piece of gear to protect your bag.
{Ladies, What To Pack for A Trip To Uganda}
Tsetse Flies and Impact on What You Wear. My upcoming trip to Uganda is slightly different from my previous trips to Africa because there are restrictions that I didn’t worry about on my previous trips. Mainly it’s highly recommended to not wear dark blue and black in Uganda (and much of Eastern Africa) due to the tsetse flies and other lovely creatures.
I’ve read varying accounts of how bad the flies and nettles actually are. It ranged from “no big deal” to “OMG!!” So…that wasn’t very helpful. Also, I couldn’t really find a concrete answer about whether wearing dark colors – like blues, black and bright colors was really a problem. I saw photos online of people wearing jeans to go gorilla trekking and wearing them around their lodge and they were fine so I wasn’t sure what to believe.
You’ll find tsetse flies mostly in forests. So what that means for humans is forest trails, water collection points in forests and vegetation close to bathing water and river banks.
I’ve decided to try to minimize my chances of getting bit/stung/eaten etc. by avoiding dark blue and black as much as possible; and stick to the colors that are recommended – khaki and green – which makes sense. But I don’t have such clothes, so you know what that means. SHOPPING!!!
Update on Tsetse flies: Throughout our two week trip in Uganda in September 2018, my husband and I were in long sleeve shirts and pants the majority of the time. I didn’t get bit. My {bald} husband did – on his head when we were in Bwindi. We don’t know whether it was tsetse flies or not but he did not get sleep sickness. This article does a good job of explaining tsetse flies and sleep sickness.
{Hiking Pants}
For petite women in particular, it is a little more difficult to find moisture wicking hiking pants and a few other items that do all of the above: fit, look good, more importantly provide functionality and are also the right colors – khaki, beige or green.
I usually buy REI’s Sahara hiking pants because they’re — err, were everything: cute, comfy, and available in short. (I’m 4’11). AND they weren’t kids pants, they were made for petite women. Awesome! right? Well it was until they totally changed them.
I went to REI’s sale this past May all excited to buy more, but they lengthened the inseam on this year’s design and the smallest women’s size were too big for me all around, not just the length. So I sheepishly made my way to the kids section to try on the girls Sahara’s which were the perfect length. But for many girls, hips just aren’t a thing yet, so that didn’t happen. I even tried on the boys sizes and that was just…no.
So over the next couple of months I started looking online at all the brands: The North Face, Athleta, Columbia, Prana, Arcteryx, Eddie Bauer etc. I liked the Prana Halle pants online but was hesitant to buy them, because they don’t explicitly state that they offer petite sizes. Despite that I guess in a way they are petite because you can select a short inseam. So I bought a pair of hiking pants from Prana and another from Columbia. Columbia also doesn’t offer petite sizes, so I bought the Girl’s large.
Update: I LOVE my Prana Halle hiking pants. I had to get them altered as they were too long, even with the short inseam, but I got a ton of use out of them in Uganda and since then. These hiking pants are comfortable, moisture wicking, and stylish. And they don’t break the bank either.
But after all my searching, Prana and Columbia had the best sizes, the right colors, the pants in stock, and each pant didn’t cost more than the Michael Kors rain jacket I bought for the trip (more on that later!).
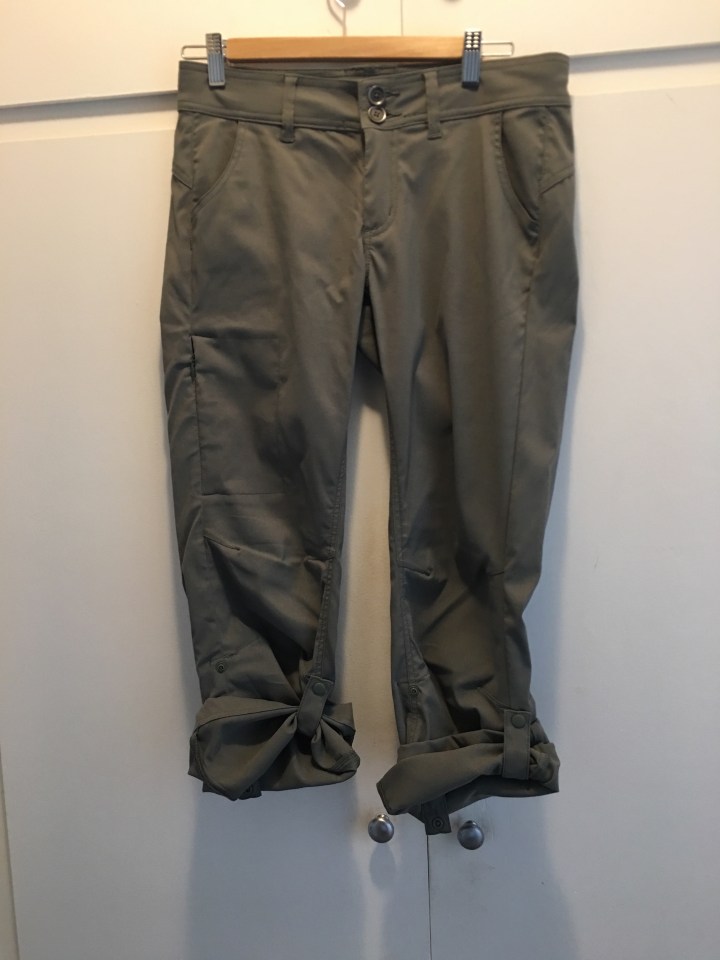
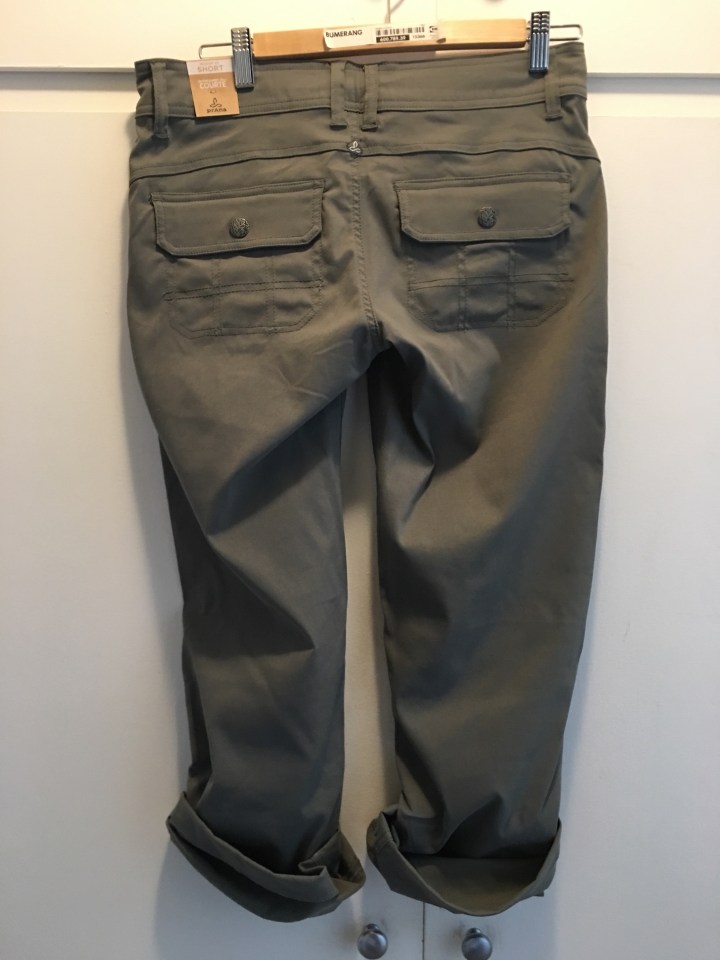
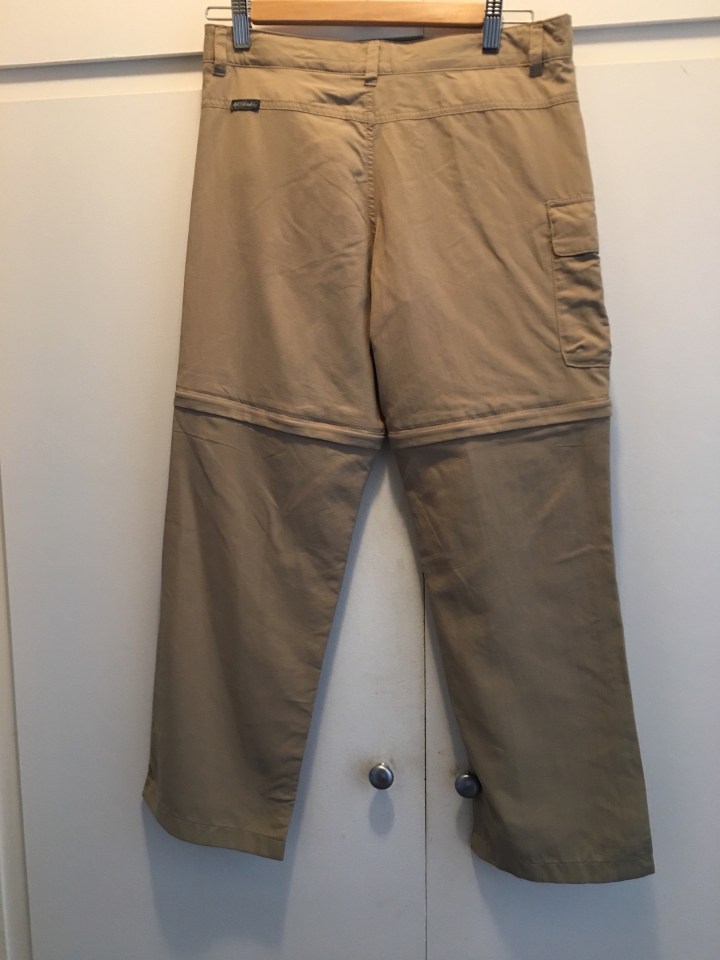
Prana Halle pants (left) Columbia Girl’s pants (right). These Columbia’s look kinda frumpy from the photos, but they’re not. I’m not a fan of the pants with shorts that can zipper off. I get it — there’s a benefit of the 2 for 1 shorts and pants, but I find that zipper uncomfortable while hiking and sitting. But I have these now so I’m going to use them, but I found myself wearing these as a last resort whenever my other pants were dirty.


(left) Prana Halle Pants in Green Jasper, Size: 2 Short
(right) Columbia Girls’ Silver Ridge III Convertible in British Tan, Size: Large
I still had to get both pants hemmed as they were too long even though I bought the Prana short and the Columbia in girls, not women. I’m 4’11”, they would have been perfect for someone at least 5’2″. Shoutout to Atherton Cleaners in Redwood City, California for doing an awesome job with the hemming!
{Prana Halle Pants Details & Review}
The Prana Halle pants are stylish, moisture wicking and quick dry. As I mentioned Prana doesn’t have petite sizes but there’s a drawstring in the waist which is perfect to allow me to cinch the waist and give me the right fit and silhouette. Again although they aren’t specifically petite they are offered in a short inseam.
Another useful feature is that these also have the snap buttons on the bottom so you can roll them up if you’re wearing them on an adventure while crossing a body of water.
As you can see I bought the Green Jasper color which is fancy talk for Olive green. They were available in khaki too, but as a South Asian woman, I try to avoid khaki and browns as they aren’t flattering on me.
{Columbia Girls Silver Ridge III Convertible Pants Details & Review}
The Columbia Girls’ Silver Ridge pants are also moisture wicking and quick dry. They’re not as stylish as the Prana pants but I really like the fabric. It feels fantastic, flowy, light, and breezy. (I sound like a laundry detergent spokeswoman don’t I?). This was the first time I’ve bought hiking pants with the built-in zipper that converts these pants into shorts. You can see the zipper in the photo below. They become shorts…bermuda shorts though, meh. Still, it’s really convenient for when you’re trying to pack light or you have to pack light, like us.
My husband and I have an allowance of 33lb. (15kg.) each since we’re taking domestic flights in Uganda on those small airplanes and that’s how much they allow per person. The moral of the story: less is more.
Hence the convertible pants – 2 for 1 special! I’m a little wary of whether the zipper where the legs cutoff will be uncomfortable on a hike. I haven’t had a chance to try them out yet. I don’t know why but bermuda shorts always make me think of Magnum P.I. I’m not really into looking like a tall white guy with a mustache, particularly because I’m a short, brown girl that pays good money every few weeks to thread my mustache. =p
Update: The Columbia pants were great for traveling. I find the built-in zipper which makes them convertible, uncomfortable so I ended up wearing these as a last resort when everything else I had needed to be washed. I found them less uncomfortable…but still uncomfortable to wear while hiking compared to on a safari drive or safari cruise where you’re sitting most of the time.
Ok now back to the article.
{Can You Just Wear Yoga Pants?}
Can you just wear yoga pants? I wondered the same thing and read what others recommended, before buying the hiking pants. And what I gathered is that they’re fine for wearing at the lodge and safaris, but not good for gorilla trekking nor chimpanzee treks or habituation treks. On those treks you’re in the rain forest getting poked and prodded by brush and branches, which will go right through yoga pants and directly to your skin.
I’m taking mine to sleep in. Ugandans and most Africans are conservative. So tight clothes – especially on women aren’t really a thing so if you’re wearing that, you’ll get stares. My advice is if you’re going to take your yoga pants wear a top that covers your bum – so as not to attract unnecessary attention.
Most women I saw (across ages) were not wearing yoga pants and leggings. They wore hiking pants and shorts.
{Safari-Friendly Tops}
{Product Recommendation: JM Collection Tops at Macy’s}
If you need or want to get some khaki and green tops for your Uganda trip without spending a ton, I recommend the JM Collection Tops at Macy’s. They’re:
- comfortable
- you can find them in khaki, beige and different shades of green
- they’re 3/4 sleeves
- flattering
- machine washable
- very inexpensive (I bought them for $15 each on sale!)
- the best part: they’re available in petite and regular sizes!
They’re so inexpensive that even if they only last through wearing them a few times, it’s kinda ok. My experience on previous safaris is that the lodges do a stellar job with washing clothes so at the very least I don’t expect them to fall apart during my trip. It’s nice that these tops are plain – no patterns so you can wear them with anything.
These go on sale every few months so just keep a pulse on them. Since most Ugandan safaris are booked several months in advance, you have the flexibility to wait for sales.
Note: these shirts are not moisture wicking material.
Update: These tops worked out GREAT for my trip to Uganda. I will definitely wear them for future adventure travels too. I felt comfortable and stylish.

{Product Recommendation: Columbia Long Sleeve Tamiami Shirts}
I also really like these long sleeve shirts from Columbia. I bought the Girls large because the Women’s sizes are too big for me but these are available in both.
I have them in 4 different colors as they’re feminine and perfect for travel – lightweight, have those easy snap close buttons, functional pockets, they’re long sleeve with tabs to roll up the sleeves, moisture wicking and quick drying. And it’s nice that they’re very inexpensive too! Though these are bright colors, I was fine. I wore them on travel days, on a day where we were just lounging around the lodge and on our river safari cruise.
I always travel with these. I love that they’re built for adventure but I can also dress them up a little. For the evenings I wear them unbuttoned with a cute camisole underneath and maybe a necklace or a scarf with earrings and pair with cute flare or crop jeans or leggings. Note: they’re not long enough to cover your bum.
I personally enjoy feeling a little put together on holiday, but also don’t want to pack a bunch of extra stuff. I find these blouses perfect for that.
{Patience Really Does Reap Rewards: Sales}
When booking a trip to Uganda you kinda have to book at least 6 months or more in advance. Most people are drawn to Uganda for gorilla trekking but there are limited permits. It doesn’t help that demand has increased for Uganda because Rwanda doubled their permit fees to $1500/person/day (Uganda is $650/person/day).
When I booked in April, for a trip in September it was like we were barely getting the last permits available. This of course depends on the time of year you go there. Summer is peak season and in November when the rainy season starts, demand decreases.
So why am I telling you this? Because booking 6 months in advance meant that I had plenty of time to shop around for gear, not only the right items but take advantage of sales. I had my eye on the Prana Halle pants and knew to wait when all the retailers do their summer/end of summer sales to get ready for fall, and that’s when my inner cheetah pounced.
I bought the current Halle pants model that as of now is last years model so I got these for about $50 instead of $85. And was able to find a rain jacket for the trip, for just about the difference – $35 (more on that later) so that was nice.
{Thanks to Fellow Shoppers!}
Can I just say, big ups to the consumers who take the time to review clothing items online and share their measurements because in the end, positive comments from other people who were similar to me, are what convinced me to buy!
{Doing Retail Returns Sucks}
The one thing that’s especially annoying as a petite woman is that often my only option is buying online. Many retailers don’t carry their petite sizes in stores. Which means I can’t try on in a store and that means more time for trial and error. I tried 4 different rain jackets before I found the Columbia one.
Shopping with Prana is less risky because they provide return packaging and a shipping label if you need to do a return. Or you can even return items in store. But Columbia doesn’t have retail stores – they’re online only. And they only provide the shipping label that you have to print out yourself and affix to your own packaging and they charge a $6-$8 restocking fee. It’s not a lot of money but when you’re buying a $25-$30 item it is a lot of money percentage wise and you feel jipped.
I returned two Columbia jackets that didn’t fit and I called them to ask that they waive their restocking fee. Their size charts are confusing and even their Customer Service recognized that. They did waive the restocking fees. The money wasn’t a big deal but the principle was – if your only option is to buy online, then the information to buy online has to be thorough and accurate. If it isn’t then the retailer should carry the burden of the cost of returns, as the consumer is carrying the burden of wasted time and not having the item that they need.
So the point of me sharing all of this, is so you know what you’re getting into before you buy from these stores that I’m recommending.
{Product Recommendation: Michael Kors Rain Jacket}
I wanted a non-sporty rain jacket and love this one from Michael Kors (this link is not exactly the one I bought but VERY similar). I love the accents of all the buttons and zippers and pockets that are not just for fashion but actually usable. The jacket can be cinched as can the hood. This is already a petite jacket but that cinch factor is nice to really customize to yourself. And the deep olive color makes it perfect for a trip to Uganda. I wore this in the evenings at the lodge. It was chilly in the evenings in Bwindi.
The gold buttons and zippers are a bit blingy. At first I wasn’t sure if I was going to keep the jacket because of that but then I tried it on with a few outfits and liked it. I think what really won me over is that it fits me so well, which is pretty hard to find. Unfortunately Macy’s isn’t carrying this exact one anymore but they do have very similar jackets. Fall and winter are just around the corner and I’m sure they’ll have really nice pieces for the season. Overall I find Michael Kors (at Macy’s) very petite-friendly so just keep checking the website.


{Product Recommendation: Columbia Rain Jacket}
I swear I’m not affiliated with Columbia in any way I just find that they make quality, value-based products that happen to fit me. I went through 3 rain jacket trials over 4 months, before I found this one. I tried jackets from Athleta and Prana but nothing fit right.
Then I found this. And to be honest, the sleeves are a little baggy but at least they don’t extend over my hands. The other thing I like about this jacket is that the inside is lined with fleece. I’m one of those people that’s always cold so I don’t mind the extra warmth. And keeping it real, I gotta say I really like the pink zipper. It makes the jacket cute. I have one of the Tamiami shirts in that same pink color so when I wear it with the jacket, it makes the outfit look put together. This jacket cost about $25 on sale at Columbia. I’m not sure I’d wear this again aside from safaris and travel. But $25 was definitely worth spending just to wear for safari and travel.


{Shoes for Uganda}
In keeping with packing as light as possible, I’d stick with two pairs:
You definitely need 1 pair of proper hiking boots/shoes — do not rely on regular sneakers. You need something waterproof with firm tread that will support your feet on the gorilla, chimpanzee treks, and other hikes. I really like my Oboz hiking shoes. I’ve taken them to Southern Africa, Europe, Costa Rica, Belize, and Hawaii several times, over the course of 2 years and they’re still going super strong. And Oboz makes small sizes. I tried Keens hiking shoes as well and liked them too but found the Oboz to be more comfortable. For your reference I have a neutral pronation.
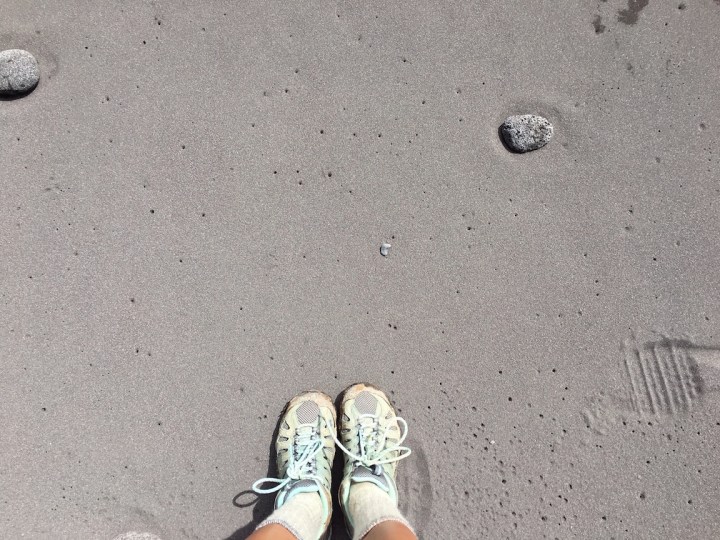
For the rest of the time at the lodges and river safaris or in transit, pack comfortable shoes that will protect your feet. A lot of other sites recommend Teva and Chaco sandals. I prefer Keens because they protect your toes and I already have them. So throughout our two weeks in Uganda I was either in my hiking shoes or Keens. I wouldn’t have wanted open toe sandals. There’s just too much dust, debris and terrain even walking from your room to the main lodge at your accommodation. Plus only having two pairs meant keeping luggage weight down.

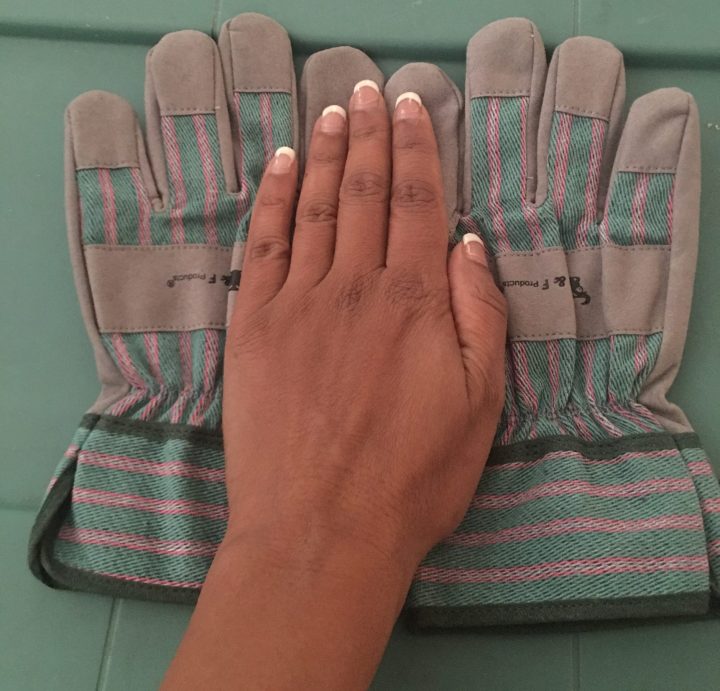
{Product Recommendation: Gardening Gloves for Very Small Hands}
It took me a bit of time and research to find gardening gloves that would fit me. I ended up buying these kids pair. You will want to pack gardening gloves for your gorilla and chimpanzee treks in Uganda. As the guides whack bushes to clear your path to the primates, you might find yourself pushing brush out of the way or even grabbing onto a tree for support – and the thick gardening gloves will protect your hands. I like that these extend a little onto my wrist so there’s no gap in-between the long sleeve shirt I’ll be wearing and the gloves.
Update: These gloves gave me a rash. It went away by the next day but still not a great experience. I threw them away after we came back. Now whenever I go hiking I take some winter gloves I got at Costco for $15 – the Head brand. I recently came back from Maui and used those gloves while hiking at the Iao Needle to protect my hands as I moved brush out of the way, and they worked great.
{Product Recommendation: Gaiters for Petite Women}
I read mixed things about gaiters. You’ll really only need these during the gorilla and chimp treks. Some people said to forego gaiters and just tuck your pants into your socks. And others said having these was essential. I went ahead and bought gaiters because I can imagine my pants untucking out of my socks during the trek and I don’t want to deal with that. Plus I like the peace-of-mind of having the coverage. It was a little difficult to find gaiters that would fit me. I found these on Amazon. I tried them on and they fit! The $14 price tag was a lot nicer than some of the $40-$50 ones I saw at stores. But I’ll let you know how they did once I get back!
Update: These worked great! I was glad I brought gaiters and didn’t just tuck my pants into my socks for the peace-of-mind. While you’re gorilla trekking most of your energy is focused on…not dying, so not having to expend mindshare about whether ants are trying to eat me was nice. And I’m gonna use them again for an upcoming trip to the Galapagos Islands! At El Chato Reserve they recommend wearing rain boots which they provide. I am not sure if they’ll have my size so I’m gonna take my gaiters. These are so light and thin they pack easily!

{Packing List}
Essentials (this assumes you’ll have access to laundry services or DIY)
- 1 pair of long pants/trousers for every 3 days you’re gone (long hiking pants, not capris, not yoga pants (see explanation above).
- 1 shirt/blouse for every 3 days you’re gone (at least 1-2 long sleeve).
- Hiking socks: ideally merino wool (NOT cotton it absorbs moisture instead of wicking); I’m going on a 9 day trip and took 3 pairs. There are days I’ll just wear my Keens at the lodge; and the lodges usually have laundry service.
- 1-2 bathing suits + a cover up: OR board shorts + rash guard/swim halter top
- A jacket or fleece: petite women, see jacket recommendations above.
- Base layers: It can get into the 60s in Bwindi. For my fellow ladies that get cold easily, pack base layers.
- 1 pair of good waterproof hiking shoes or boots: (not just regular sneakers). Oboz is a newer brand and makes high quality hiking boots for smaller women. Keen does too. I found Merrell to be hit or miss with small size availability.
- 1 pair of sandals or shoes to wear at the lodges and in transit. I wore my Keens.
- Sports bras not underwire bras: Long card rides + very bumpy Ugandan roads = need to support your girls
- Underwear: I’m sure you can figure out quantity on your own
- Pajamas
- Hat: wide brimmed hat, but make sure it fits really well and stays on your head or has those chin straps to ensure it stays on. And maybe a baseball cap? While trekking, especially at Bwindi, a wide brimmed hat might brush against the…brush, and fall off throughout whereas baseball caps tend to be more snug.
- Polarized sunglasses
- Eyeglasses (if you wear them)
- A good daypack: something you can fit a bagged lunch, water, your rain jacket and other essentials inside of.
A note about skirts and dresses: You can take a dress or skirt to wear at the lodge. I personally decided against it because then I’d have to pack another pair of shoes and because – dresses – even maxi’s, don’t protect as well from the elements. But you can totally pack some dresses or skirts. Or pack your cutest yoga pants or leggings or even cute jeans + pretty scarf and very light jewelry i.e. studs and a small necklace. The lodges – even the fanciest ones are all casual attire so you don’t have to pack dresses and skirts. This is just if you want to.
Please be culturally aware. Most African countries are conservative. Throughout Africa (outside of the big cities), women showing their legs is not a thing. If you’re going to wear a dress, make it a maxi and nothing super form fitting.
FYI-at all 3 luxury lodges I stayed at throughout Uganda not a single woman wore a dress or a skirt – they were all in pants or capris.
Notes applicable to all clothes that you pack:
- machine washable
- moisture wicking (ideally)
- khaki and green colors (ideally)
Nice to Have Items for Your Trip to Uganda:
- Buff: stretchy cloth that can be worn as a neck gaiter, headband, skull cap and lots of other ways
- *Binoculars: you won’t need them while gorilla trekking but nice to have for river safari at Murchison Falls and at your lodge in Bwindi
- Lightweight flashlight: useful at your lodge after dark. Make sure to pack some extra batteries too.
- I really like these disposable mini travel towels. They’re useful for so many things! I take them with my on every trip!
- Travel pillow: I REALLY like my Trtl travel pillow – very compact, light, and keeps my neck nice and warm!
- A baseball cap
- Wide brimmed sun hat with a chin strap
- Quick drying travel towel + mesh bag: Your lodges will probably provide towels but a nice thing to have if you’re out and get caught in the rain. Store it in a mesh bag so it properly dries.
{Buying Binoculars}
There are several binocular brands and types – with varying uses and applications. In Uganda you wouldn’t use binoculars for gorilla trekking. The guides lead you to the gorillas who get pretty close to you. On the other hand, you might find binoculars useful during a Nile river safari at Murchison Falls. And definitely on safari in other countries like Tanzania, South Africa and Zimbabwe.
You can find binoculars for $30 to $3000. Like any hardware there are factors that influence quality and price – coating, casing, weight, size, magnification, lense quality etc.
I’m a fan of doing a bit of homework to understand what to look for in products, to make informed decisions. B&H Photo Video published this really informative binocular buying guide.
I bought these Bushnell binoculars. For me, they’re a good intro pair to try. The driving factors that led to buying these were:
- 10x42mm – that is 10x magnification of items compared to the naked eye and a 42mm diameter for a nice wide depth of field.
- Roof prism binoculars tend to be more compact and less weight.
- These are adjustable to fit the pupillary distance of my eyes on my smaller face but my husband can still use them too.
- Waterproof and fog proof
For Gorilla Trekking
- Wear one of your long sleeve shirts
- Wear long pants
- Rain jacket with a hood
- Wear your buff or a scarf as a neck gaiter or head band
- Hat: some people find wide brimmed hats distracting as you’re trying trekking through the bush. Maybe not a wide brimmed hat for the gorilla trek, but a baseball cap instead. But if you’re going with wide brimmed hat (which I recommend, especially for sunny days) get one with a chin strap.
- Utility vest? or money belt?: So, I’d only recommend a utility vest or a money belt if the pants and shirt you wear for gorilla trekking don’t have functional pockets.You know how sometimes women’s clothes have fashion packets with 0 functional value? During the trek, you’re gonna wanna have easy access to snacks in your pocket, so keep them on you, and not in your daypack which the porter that you hire will be carrying. And you can put your passport in there as well or put it in your daypack. You’ll need to take your passport for the park rangers to verify your gorilla permit.There are some really cute utility vests out there, but that’s increasing weight…so tradeoffs. And if it starts raining, you’re gonna have your utility vest + rain jacket on….while it’s hot and you’re trekking. Unless you decide to be that person in the group who makes everyone stop over and over while you get sorted.
Update: I was glad I didn’t have a utility vest. I went trekking two days and both days it was beautiful and sunny. And we found the gorillas within 1.5-1.75 hours so we never stopped to take a break or have a snack. However, another group that trekked in a different area of the National Park found the gorilla family but they were up in the trees. So they plunked down on the forest floor, had lunch and waited until the gorillas came down from the trees. Still I don’t think a utility vest would have been necessary, just a good daypack with snacks etc.
- Energy boosting snacks: Clif bars, trail mix, chocolate. Since you’re packing this in your luggage, I’d go with Clif bars or KIND bars because they’re light and individually sealed airtight. Trail mix is bulkier/heavier and can spoil. Take these with you from home. There won’t be a place for you to buy anything like this there (unless you’re stopping over in a big city like Kampala or Jinja).
- Gardening Gloves: During the trek you might grab onto and brush branches/trees and debris.
- Gaiters?: I read mixed things about these. You’ll really only need these during the gorilla and chimp treks. Some people said to just tuck your pants into your socks, while others said these were essential. I went ahead and bought gaiters because I can imagine my pants untucking out of my socks during the trek and I don’t want to deal with that.
- I’m glad I bought gaiters instead of tucking my socks into my pants. At the same time I know I’ll get future use out of them. There were people in our gorilla group in their 60s and 70s, a couple of whom struggled through the journey. For them I imagine the number of hikes where they’d need gaiters is very few.
- Baby wipes, ziploc bags, hand sanitizer: In case you’ve gotta go, during the trek there are no facilities. The guide will find a safe space for you to take care of business. You’ll need baby wipes to clean off and ziploc bags for the used wipes as there are no trash cans around. Put the bags in your daypack and discard them back at the lodge. Bonus points if you take biodegradable bags!
- Cash for tips: (notes not coins): You will want to tip the guide and porters after the trek. Figures vary, but no less than $5USD per person. Most people give a few dollars more to the guide. And no $1 bills, nor coins. Actually this applies not just for gorilla trekking but your whole trip. Best to have $5, $10, $20 bills on you.
- Your camera
- Trekking poles: don’t bother with taking them from home. The porters have them there for purchase or hire, for people of all heights. Note: traveling with trekking poles means you HAVE to check in your luggage.
- The lodge you’re staying at should provide food and water for each person for the trek. You can put it in your daypack which will be carried by your porter.
Tech Gear for Uganda
- 1 camera * scroll down for how to carry DSLR while gorilla trekking
- Enough memory cards
- For DSLR users: a low light lens and a wide angle lens – this will help you take great shots in low light conditions during the gorilla and chimp treks and it has a good zoom given that you get pretty lose to the gorillas (compared to other safaris).
- Extra battery for camera – Most lodges don’t have outlets in the rooms but rather in the common area so you’ll be sharing with other guests (another reason we suggested the surge protector power strip). An extra, pre-charged battery is a good idea in case you can’t charge up.
- Sun shades and filters for camera lenses
- Camera/lense cleaning supplies
- Rain cover for the camera
- Travel adapters (Uganda outlets are the same as the UK)
- Surge protector charging strip (update: we ended up not needing this).
- Ear buds
- Phone + charger
- e-reader
- Selfie stick
- Silica packets?: Most lodges don’t have air conditioning nor heating so this may be a moot point, but just in case you are staying somewhere with air conditioning/heating, take a large ziploc bag and put silica packets inside – with the high humidity you will want to put your camera inside with the lens attached or the lens unattached with caps on and let your camera adjust to the temperature difference between the aircon area and the outside temperature, before you use your camera, to avoid condensation build up.
- Tripod/monopod etc.?: Unless you’re a VERY serious photographer or even a pro photographer you really won’t want to deal with a tripod/monopod etc. while trekking for chimps nor gorillas. The gorillas have been known to get really close to the people so having a stand will just detract from the experience.
Update: Unless you’re filming the next Planet Earth, do not take a tripod or monopod with you. It’s extra weight for nothing.

Toiletries
- Anti-humidity hair serum: Let me say it again. Anti-humidity hair serum. Ladies, it’s hot and humid over there and you don’t want your locks looking wilder than the jungle you’re surrounded by.
- Small shampoo/conditioner: Most lodges provide this and soap, but just in case.
- Rubberband hair ties: not claw clips because you’re gonna be wearing a hat much of the time and I don’t know about you, but those clips are uncomfortable with a hat.
- Hair clips
- Travel hair brush: leave the curlers and dryers at home, you won’t need them and most lodges don’t allow them as they occupy too much electricity.
- Almond oil + cotton balls: This is my face moisturizer replacement. Almond oil is a natural moisturizer that absorbs right into the skin and leaves it feeling and looking vibrant, smooth, and healthy. I put it in a small glass vial and take it with me on all of my travels.
- Face cleanser
- Face + body sunscreen
- Good bug repellant
- Chapstick – though you can use almond oil for that too.
- Toothpaste + toothbrush + floss
- Deodorant/antiperspirant
- Basic first aid kit
- All prescriptions and other medications, including contact lenses
- Travel tissues
- My travel hack to rejuvenate tired feet
Documents
- Passport
- Visa: Yellow Fever: proof that you had the shot
- Extra passport pictures: (precautionary travel hack followed by frequent travelers)
- Tour itinerary and contacts: Printed out. Having it in Google docs/your email is good too, but you might not always have internet access in Uganda.
{How to Carry Your DSLR While Gorilla Trekking}
I wrote a whole article on How to Carry Your DSLR While Trekking, Hiking, Traveling – For Women.
While you’re trekking – before you find the gorillas – you’re going to be too busy getting b!*$h slapped by brush and branches that you won’t be able to take pictures and…survive. Keep the camera inside your daypack, which is carried by the porter you’re going to hire. If anything, if you have a GoPro or DJI Osmo Action or other action camera that can be attached to your person so you’re not carrying it or you can stick in your pocket – ATTACHED to a selfie stick so you can whip it out and use it easily – then do that. But the DSLR should just stay in your day pack until you find the gorilla family. Once you arrive to the gorilla family, your guide will instruct you to put all of your stuff down and that’s when you can get your camera. You can only approach the gorillas with whatever you have on your person. You will leave your bag with the porter.
The way it works is once you find the gorilla family, you’ll stop in front of them. The porters will stay behind with your bags and you and you and your group will move ahead, closer to the gorillas.
You get 1 hour with the gorillas and in that time you can carry your camera however you feel most comfortable. From what I read of other people’s experiences, is that the hour goes by really really fast. So trying to change lenses, setting up a tripod etc. is not a good idea.
The best thing is to go with one camera body with a low light, zoom lens attached + your iPhone/Samsung etc. And that’s it.Remember: no flash photography allowed. That’s why that low light lens is so important. Oh and make sure you have a rain cover in your pocket.
Update: I carried my camera by the Joby strap I bought (not the terrible strap that the camera comes with) – no carrying bag or case. I had a rain cover in my pocket, but I didn’t need it on either of the days I went trekking. I was comfortable and had quick access to the camera. It’s REALLY REALLY REALLY important that you take a lens with low light capability. When the gorillas are on the ground they often take refuge underneath trees. The canopy of the trees creates darkness and so the gorillas just look like a black blob as they are camouflaged.
Also, take a wide angle lens (not for gorilla trekking but the rest of the trip) so you can capture images of the vast scenery. Sure you can take wide images with your phone, and honestly the quality is really good. But still personally I prefer the ability to change settings and get creative with my DSLR. Of course more lenses = more weight to carry.

{Carrying your DSLR For Chimpanzee Trekking}
For this, since the terrain is much flatter compared to gorilla trekking, most people don’t hire a porter. I’m going to carry my DSLR in my crossbody bag. The chimps can move around a lot so being as lightweight as possible is key as you follow them. You can use the same low light lens for chimp trekking as for gorilla trekking as there will be similar low light conditions. And pack your rain cover.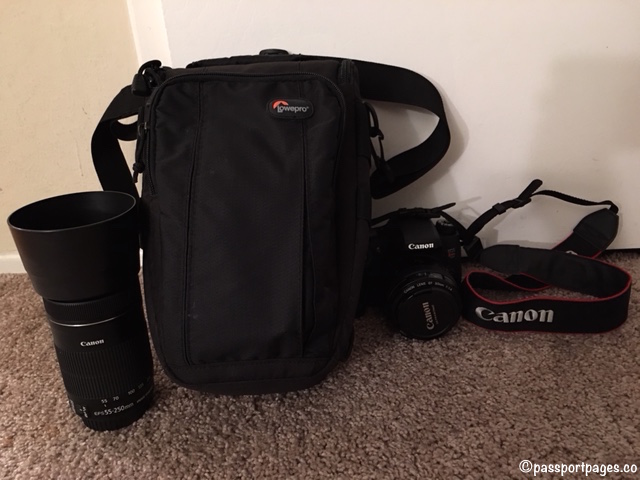
At Murchison Falls and Ishasha, you’re going to either be in a boat or safari vehicle so no special gear or consideration needed for your DSLR. You’ll want a zoom and a wide angle lens nearby, but always balance that out with your comfort with the heavy weight of camera equipment.

{Bathroom Breaks In the Bush}
At most tourist sites there’s a public bathroom at your departure point. In Bwindi and at the Chimp Trek, before we started trekking there were proper bathrooms with plumbing, no soap, or hand dryers, and multiple stalls. Some public restrooms are just a toilet. So it’s a good idea to be prepared:
- 1-2 rolls of toilet paper
- Hand soap
- Compressed towels*
- Hand sanitizer
- Microfiber towel to dry hands
- Biodegradable trash bags
Other products that seem useful but I’ve never purchased:
Toilet seat covers
Female urination device(?)
*The compressed towels have been a great add to my travel gear. They’re tiny, weigh almost nothing and perfect for washing your hands, face, or even just to use to freshen up.
Toilet Seat Covers. I think the US is the only country where toilet seat covers in public bathrooms is a thing. It’s definitely not a thing in Uganda. You can buy disposable toilet seat covers on Amazon. I didn’t take them because I just used toilet paper.
Going While On a Hike, Game Drive or River Safari. There are no restrooms on the hikes and game drives. If you’re out on a hike or game drive and you have to go, then ask your guide and they will spot a safe place for you. The rest of the items listed above will come in very handy too. I’ve never tried a female urination device but I know people who have and they are glad they got one.
{Summary}
In this article I covered what to pack for a trip to Uganda for women, including:
- Luggage
- Clothing
- Toiletries
- Travel Gear
- Camera gear
- Bathroom breaks when you’re out and about
I hope you enjoy Uganda as much as I did! It truly is the Pearl of Africa! Here are some of my favorite photos I took during our trip. Have a wonderful trip and if this article was helpful or if you have any questions, please leave a comment.


If you found this helpful, please post a comment! Have questions? Ask! This will be an epic trip!


2 thoughts on “Women’s Guide to Packing for A Trip to Uganda; Petite Women You’ll ESPECIALLY Like This.”