

Updated May 2025
In this article:
- Clothing List
- Gear List
- What To Pack in a Day Pack
- Food and Picnic Gear
- Bathrooms in Banff and Jasper
- What to Pack in Your Car + Weather
- Tech Gear
September (after Labor Day in the USA), is the start of the shoulder season in Banff and Jasper National Parks. It’s busy, but not bananas and not crowded. From that perspective it was a great time to go – the weekend after Labor Day. We had some hiking trails and sites to ourselves, early in the morning. And even later in the day, there were a lot of people around at some places, but it never felt crowded nor even very busy. We found parking in town easily every day and only encountered one restaurant with a long wait time in Banff town.
Rain in September. The downside of going to Banff and Jasper in September is that there may be inclement weather – rain. Also the weather changes quickly, making it unpredictable. To give you a sense of just how unpredictable – all day today the forecasts said there was anywhere between a 60%-80% chance of rain starting at 3pm and lasting throughout the rest of the day and night. It’s currently 9:20pm and it has not rained at all! I checked multiple websites to verify the forecasts and they were consistent.
While I’m so glad it didn’t rain, I knew it could have at any moment, so we prepared and planned our day accordingly. If we weren’t worried about rain we would have done other things. The forecast impacted our entire trip – what we saw, sites we didn’t visit, and how much we saw on a given day.
Don’t get me wrong we’re having an INCREDIBLE time but rain definitely impacts a trip here. You can curb its impact by being prepared. In this article I’m sharing the items I packed and why, didn’t pack and why as well as anything I should have packed.
Packing Lists
I’ll start with the clothing list, then the gear packing list and separately what to put in your day pack and in your car. Below each list is more detail/thoughts for each.
Women’s Clothing Packing List for Banff and Jasper in September
- 1 pair of hiking pants for each day
- 1 hiking shirt per day
- 1 sports bra for every 2 days
- 1 pair of hiking socks per day
- 1 rain jacket
- 1 REALLY cold-weather jacket
- 1 cold-weather hat or headband
- 1 sun hat/wide brimmed hat or baseball cap
- 1 scarf or neck buff
- 1 pair of cold-weather gloves
- 1 pair of hiking shoes or boots
- 1 pair of other comfortable shoes or sandals
- 1 swimsuit
- 1-2 cute outfits
- Underwear
Note About Jewelry and Accessories. Leave the expensive jewelry at home. I wore a pair of fashion earrings throughout the trip but that was the only jewelry I had. We tended to go to dinner at a restaurant in Banff town, straight from the day’s activities vs. going back to our hotel to freshen up first. If we had, I would have packed a few more pairs of earrings and maybe a couple necklaces as well as some cute outfits to wear to dinner – but that’s just personal preference. It’s a casual place.
Don’t Forget to Pack:
- Eyeglasses
- Contact lenses
- Sunglasses
- Watch
Details for the Clothing Packing List
Hiking Pants vs. Leggings. I packed hiking pants instead of shorts and athletic leggings to protect my legs from debris while hiking. It’s happened to me before where I got poked by a tree branch which poked right through the leggings, to my skin. So I didn’t pack any athletic leggings. But I saw a lot of women hiking in leggings as well as shorts. At that time of year I would have been cold in shorts. But if I had gone earlier in summer when it was hot, I would have taken shorts or skorts.
But it turned out that leggings would have been totally fine for the whole trip. Johnston Canyon was an easy hike and a solid path, away from any trees. In general, I didn’t get whacked by trees or debris on any of the hikes; so leggings would have been fine.
Athletic Wear Recommendations
I’m a fan of Prana’s Halle (hiking) pants and anything at Athleta (they sell petite, tall, regular and plus sizes). I like Alo and Lululemon very much. But unfortunately the latter two brands do not carry petite-specific sizes so for women who are 5’4″ and under, the fit in the armpits and sleeves tends to be slightly off; and the seams too long.
That said, generally I have found Lululemon’s quality a bit better than Athleta – my Athleta leggings start pilling faster. I can’t comment on Alo’s quality as I have never purchased anything from there. I have a pair of Lululemon leggings that are too long, so I roll them under. I bought them 13 years ago and only recently noticed some minor fraying in one seam, despite wearing and washing pretty regularly.
Athleta’s Headlands Hybrid Cargo Pants are perfect for hiking and also very stylish. I also like that Athleta has leggings designed for cold-weather hikes/activities i.e. the Rainier and Polartec lines which are comfortable, stylish and keep you warm. I bought Rainier as well as Polartec leggings last year, ahead of a winter trip to Toronto and I was very cozy and comfortable walking around the city and Niagara Falls all day.
If you need new clothes, you might also look at REI. I’ve had pretty good luck with petite hiking pants, even large girls sizes and on one occasion the boys section. I bought boys large, waterproof pants from there.
If you’re in Canada, check out Mountain Equipment Company too. It’s the REI of Canada. They have great pieces that are stylish, but no petite sizes.
If you go Toronto/Eastern Canada during the winter buy a coat and/or jacket. The selection is nothing like what we get in California. There are so many more brands, styles, purposes, and weights.
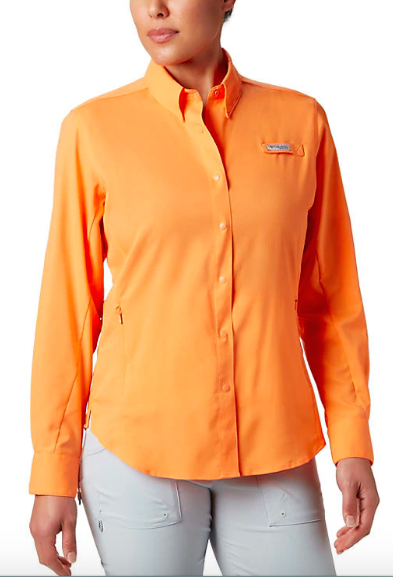
Hiking Shirts. I like these Tamiami shirts from Columbia. They’re long sleeves, moisture wicking, nice colors, zippered pockets, and machine washable. Their low price tag is nice too! I have a few of these in different colors. I wore one everyday with a camisole underneath so that as I got warm while hiking I could shed layers. These are available for Men, Women, and Girls. For petite women, I recommend the Girls sizes. The Girls XL fit me perfectly (4’11”; 100lb.)
The only thing I don’t like is the velcro’d Columbia logo over the right breast which screams “not stylish”, in my opinion.
Clothing Purchased After My Trip, But Would Have Taken
I bought the items below after I went on my trip to Banff. I have taken them to several places around the world since then and they would have been great for Banff too.
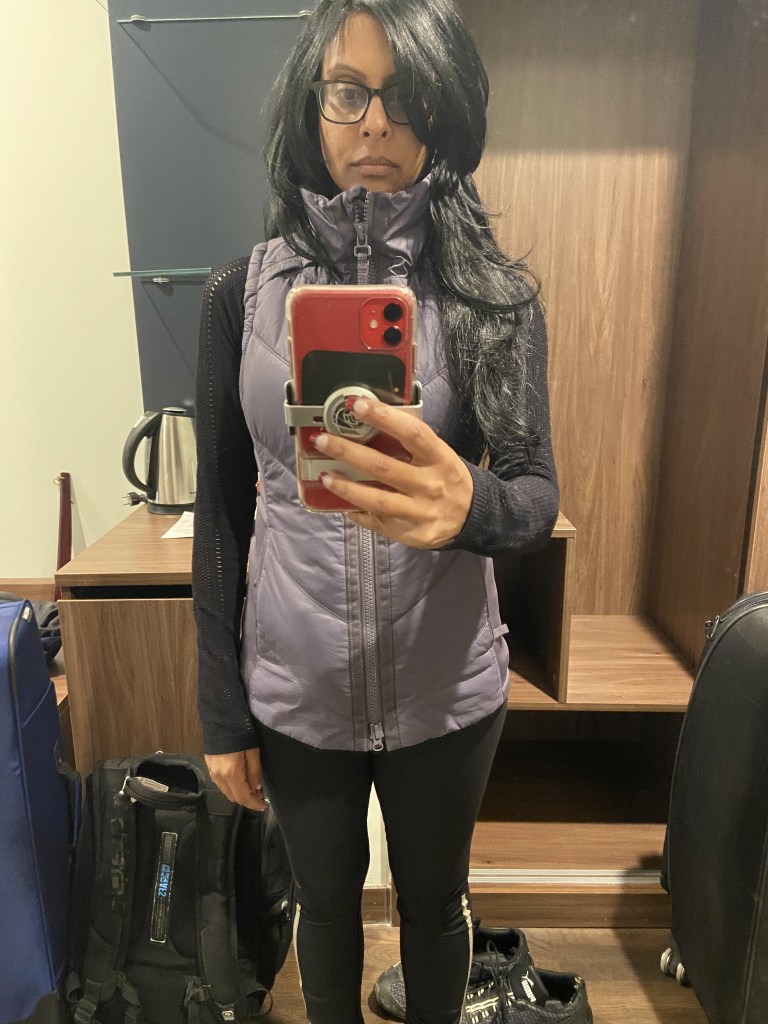
Athleta’s Momentum and Uptempo tops. They come in different styles: hoodie, non-hoodie, sleeveless, short and long sleeves. Unfortunately the Uptempo line isn’t available anymore, but I urge you to keep checking back on their website, as they come out with new products every few months. The Momentum long sleeve tops are great to wear with a vest. These are what I would compare to Lululemon’s Swiftly Tech tops. Athleta’s Triumph hoodie is cozy, has a flattering, form-fitting silhouette, and comes in great colors.
Lululemon’s Define jackets are beautiful and sexy while also being great for hiking or as street-wear. They’re moisture wicking, long sleeves, have pockets, and you can layer a fleece or packable jacket over it.
I wanted a Define jacket for like several years and tried it on a few times but the armpits and sleeves never fit right. Recently, on a whim because I was walking past the store at the mall I ended up buying a Define Luon jacket. I don’t know if there’s something different about the cut of that particular style, but it fit perfectly.
I love Lululemon’s Down For It All Vest too but they don’t come in petite, so it wasn’t for me but maybe it’ll work for you.


Sports Bras. I definitely recommend sports bras vs. underwire bras. They’re more comfortable, which you need when you’re doing serious hikes. Make sure your sports bras are moisture wicking. I took 3 sports bras for a 5 day trip and used all 3. In the evening back at the hotel, I hand washed my bra from that day. If you look up ‘travel laundry detergent’ on Amazon you’ll find lots of options. I buy sports bras from Old Navy and Amazon.
Hiking Shoes. This is a destination where you need proper hiking shoes. Don’t just wear your regular sneakers. I like Oboz’s Sawtooth hiking shoes. They have gotten me through tricky trekking in Nong Khiaw, Corcovado National Park, hikes in Belize, gorilla trekking in Uganda, Machu Picchu, all over the Galápagos Islands, trekking in the highlands of Vietnam, all over Hawaii, lots of local hikes here in SoCal, and of course Banff. I’ve had them for 7 years and they’re still going strong despite putting them through rivers, ponds, streams, mud and other terrain.
But Oboz is not the only choice. There are so many good ones out there. I like Keen and Merrell hiking shoes too – they just didn’t fit me as well as Oboz.
Hiking Socks. I can’t emphasize enough how important moisture wicking, proper hiking socks are vs. regular socks. We had action-packed days of hiking and outdoor activities; and I would have felt unstable and uncomfortable wearing ‘regular’ socks. I did end up wearing regular socks on the last day as they were the only clean pair I had. We did a couple of hikes that day and my socks kept slipping off of my heels – so annoying! You don’t have to buy expensive hiking socks. I bought these on Amazon in 2017 and have taken them all over the globe. They’re still going strong and I spent a little over $21 for 3 pairs.
Cold Weather Jacket. Feeling cold is very subjective. While I was bundled up walking around Banff in my big The North Face down jacket, I saw people walking around in t-shirts. My best advice here is to look at the temperature before you leave. You know you. Pack cold-weather gear accordingly.
Rain Jacket. I had my big The North Face jacket as well as a light Columbia rain jacket. I ended up wearing The North Face jacket the whole time but I liked having the peace of mind that for warmer days with potential rain I had the option of switching into the Columbia jacket.
Cute Outfits. I packed one cute outfit but ended up not using it because of the flow of our days. We were up and out the door very early every day and stayed out all day. In the evening, as we headed back to Banff town, we went straight to a restaurant for dinner, and then back to the hotel for the night. If we had gone back to the hotel before dinner and had a chance to freshen up, then I would have changed into the cute outfit.
Gear (Non-Clothes) To Pack for Banff
and Jasper in September
Most of the gear is relevant regardless of the time of year. Anything related to weather is time of year dependent.
- Reusable water bottle
- Binoculars (if you’re into birds)
- Camera
- Trekking polls (if you use them)
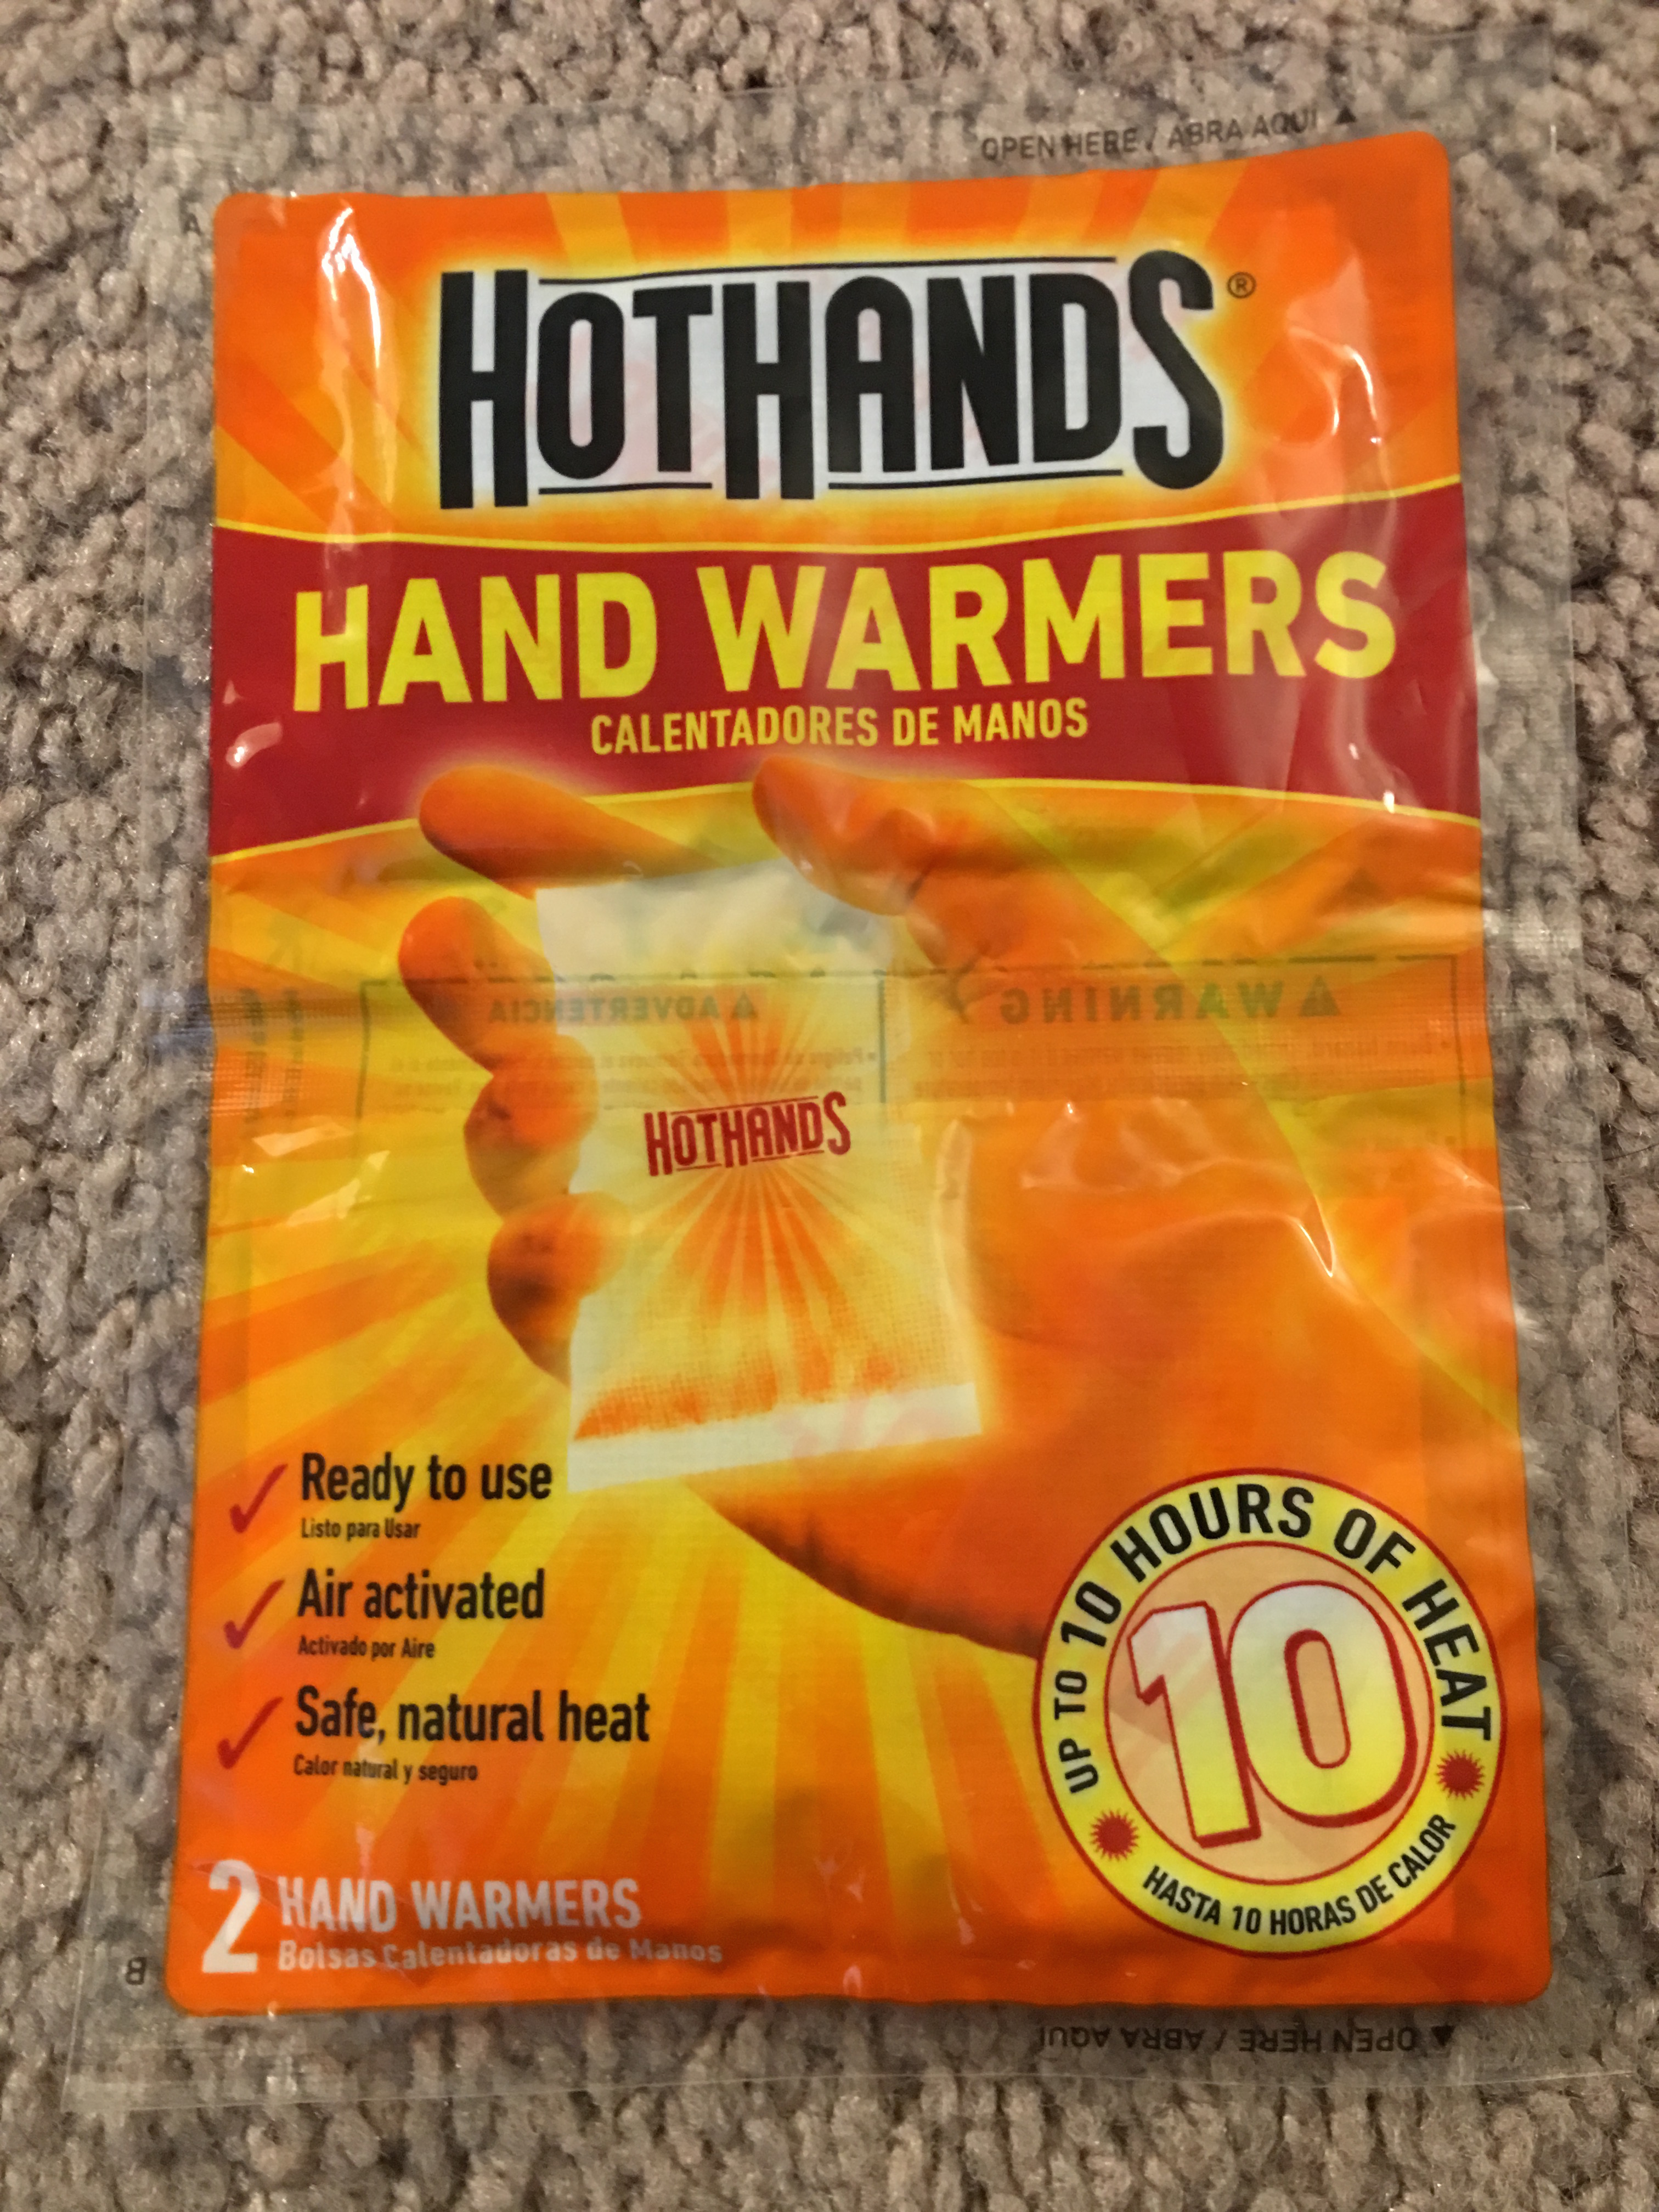
- Hand warmers (weather dependent)
- 1-2 microfiber towels
- 1 Drybag
- 1 Rain cover for each day pack
- Sunscreen
- Tissues
- Hand sanitizer
- Chapstick
- Moisturizer
- Picnic stuff (more details inside)
- Bathroom kit
- Car phone mount
Trekking Poles. Something nice to have for those that need the support.
Rain Covers. Rain covers for your day pack and camera are important. My previous DSLR died from spray from a waterfall. Water damage is real. If you get caught in the rain you’ll want to make sure your camera and other gear don’t get damaged. This Lowepro toploader comes with a rain cover though it screams DSLR and it’s for protection when you’re not using the camera – just carrying it around. The Peak Design weather cover for when you’re actually shooting photos.
You can buy a rain cover for your backpack on Amazon and many Osprey and REI packs come with them.
Hand washing and Bathroom Gear. There are proper restrooms at the bigger sites like Johnston Canyon, Lake Louise and the Athabasca Glacier. But most of the trailheads have an outhouse. Toilet paper is a maybe and soap and water to wash your hands will be, no. I always had a bathroom kit in the car with toilet paper, hand sanitizer, a small bottle of hand soap and these coin compression towelettes so we could properly wash our hands.
Picnic Gear. If you’re not picnicking in Banff then you’re missing out. I packed paper (not plastic) plates, bowls, cutlery, cups, tissue packs to use as napkins. I took these items with me from home because I had them in my pantry and had enough room in my luggage.
But if you don’t, there are plenty of places to buy picnic gear in Banff town. I didn’t take a collapsible travel cooler because the weather was pretty cold. If we had gone earlier in the summer I would have.
Car Phone Mount. You’ll likely be using Google Maps or some form of GPS on your phone. We took our Wiz Gear with us and were so glad, as it made navigating simple. We left this in the car for the duration of our trip. I put it in the daypack section, so you remember it, the first day. Don’t forget to remove it when you return your rental car!
Some, more modern cars, don’t have the old school vent to attach the Wiz Gear or it’s location isn’t conducive to navigation as happened to us last year when we rented a car in Phoenix. This is difficult to determine depending on the rental car company as you not always know in advance what vehicle you will get. Rental companies may include a phone mount or offer it as an add-on.
What To Pack In Your Day Pack
Water Bottle. Many drives and hiking trails are long and/or uphill and you’ll need water to stay hydrated. As you drive from Banff to Jasper or vice versa, or on the Bow Valley Parkway there’s none or few places to stop to buy things. So I recommend setting off each day prepared. I LOVE my Zojirushi water bottle. It fits in every water bottle pocket in every backpack/sling I own and more importantly, the insulation keeps my beverages HOT or cold.
Food and Snacks. Again, once you’re out of Banff town or on the Icefields Parkway there are very few places where you can buy anything. If you’re going in summer, I recommend packing a collapsible travel cooler, as you probably won’t have access to a freezer to freeze your ice packs but you can buy ice from the IGA grocery store or Nesters Market, both in Banff town. Plus, you’ll want to picnic anyway. There are many places to stop that have picnic tables, benches or simply lookout points with stunning views. As for our daypacks and what we carried on any long hikes or activities: water bottle + snacks. Sometimes we carried 2-4 KIND bars, crackers, carrots, hummus.
Tissues and Chapstick/Lip Balm. Have you ever been running or exercising and your nose starts to run? That happens in Banff too. Take tissues and a bag or container to store soiled tissues until you can throw them in the trash. We were so glad we brought Chapstick as we didn’t realize the air would be so dry.
Gloves. I had gloves because of the cold weather but they also served to protect my hands if I had to grab onto a tree or butt scoot while hiking.
ProTip: in my experience gloves that are phone-friendly (e-tip etc.) are good for light phone use. Otherwise I like fingerless gloves or fingerless that have ‘caps’. If you are a petite woman or have small hands, kids gloves are great. I returned the pricier e-tip The North Face gloves for $7 phone-friendly, kids gloves at Costco.
Sunscreen. The UV rating in Banff is high. You’ll want a sunscreen with SPF 30 or higher. Don’t forget to apply it at last 15-30 minutes before you set out, to give it time to absorb into your skin. Keep it in your daypack so that you can reapply it throughout the day – they say every two hours. As a brown woman, I like this sunscreen and this sunscreen which leave no white cast.
Sunglasses. Self explanatory. But prescription sunglasses have been one of the best pieces of travel gear that I have ever invested in.
Hat. I packed a wide brimmed sun hat as well as a cold weather hat, and used both. The first two days were bright and sunny. The last couple days it was overcast and cold.
Rain cover for your backpack. The last thing you need is for all your gear to get soaked and/or ruined. If your backpack didn’t come with a rain cover, you can find one on Amazon. This came in very handy as we were out on a trail when it started raining. It’s super lightweight too.
Neck Buff. These multipurpose cloths come in handy as lightweight scarves, headbands, handkerchiefs and more.
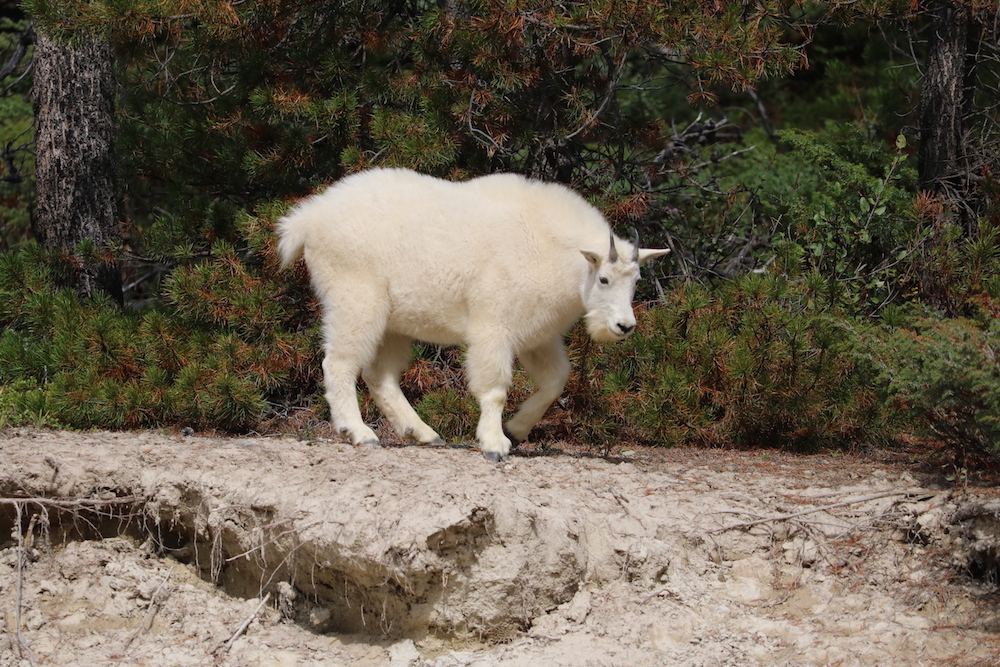
DSLR Gear. I carry 1 camera body, 1 wide angle lens, 1 zoom lens, 1 extra camera battery (fully charged), 2-3 extra memory cards (empty cards), wipes to clean the glass. This is one destination where you might want to prioritize using a DSLR over your phone’s camera – if you like to photograph wildlife. Otherwise the iPhone cameras are very good and a lot less gear to carry.
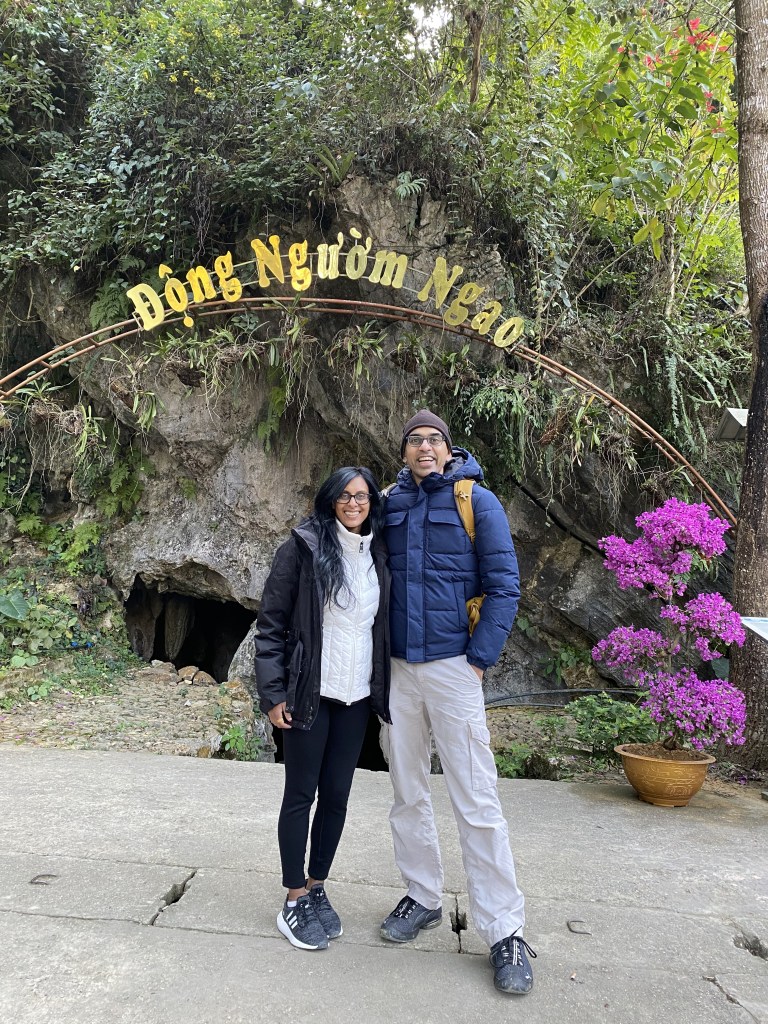
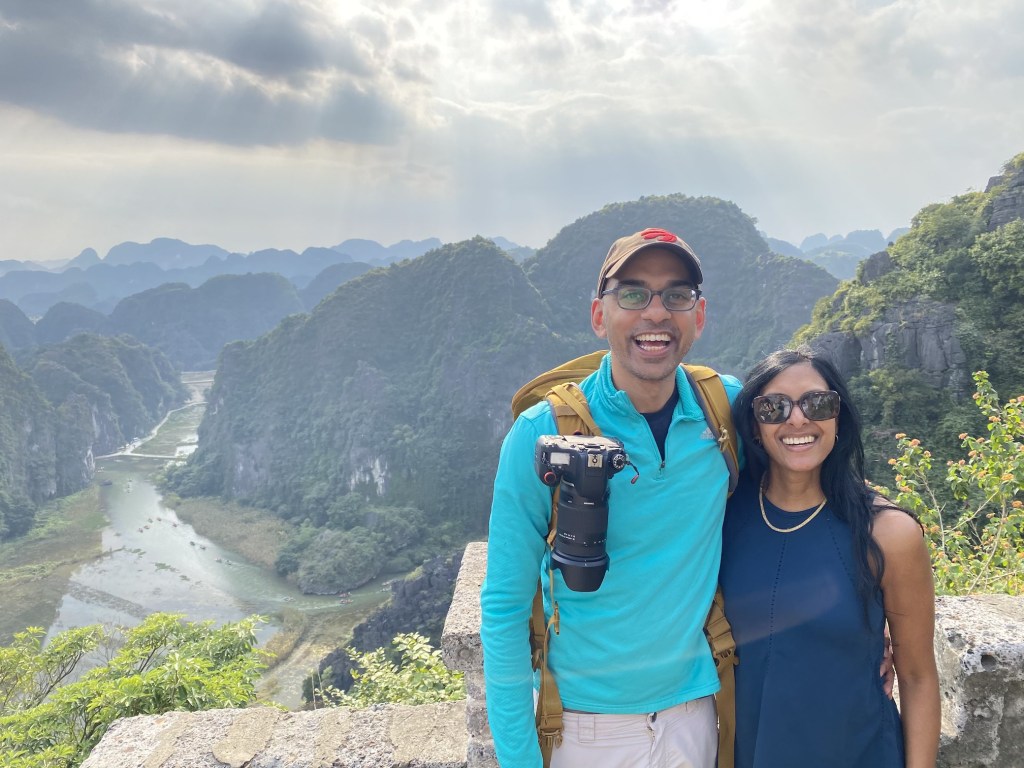
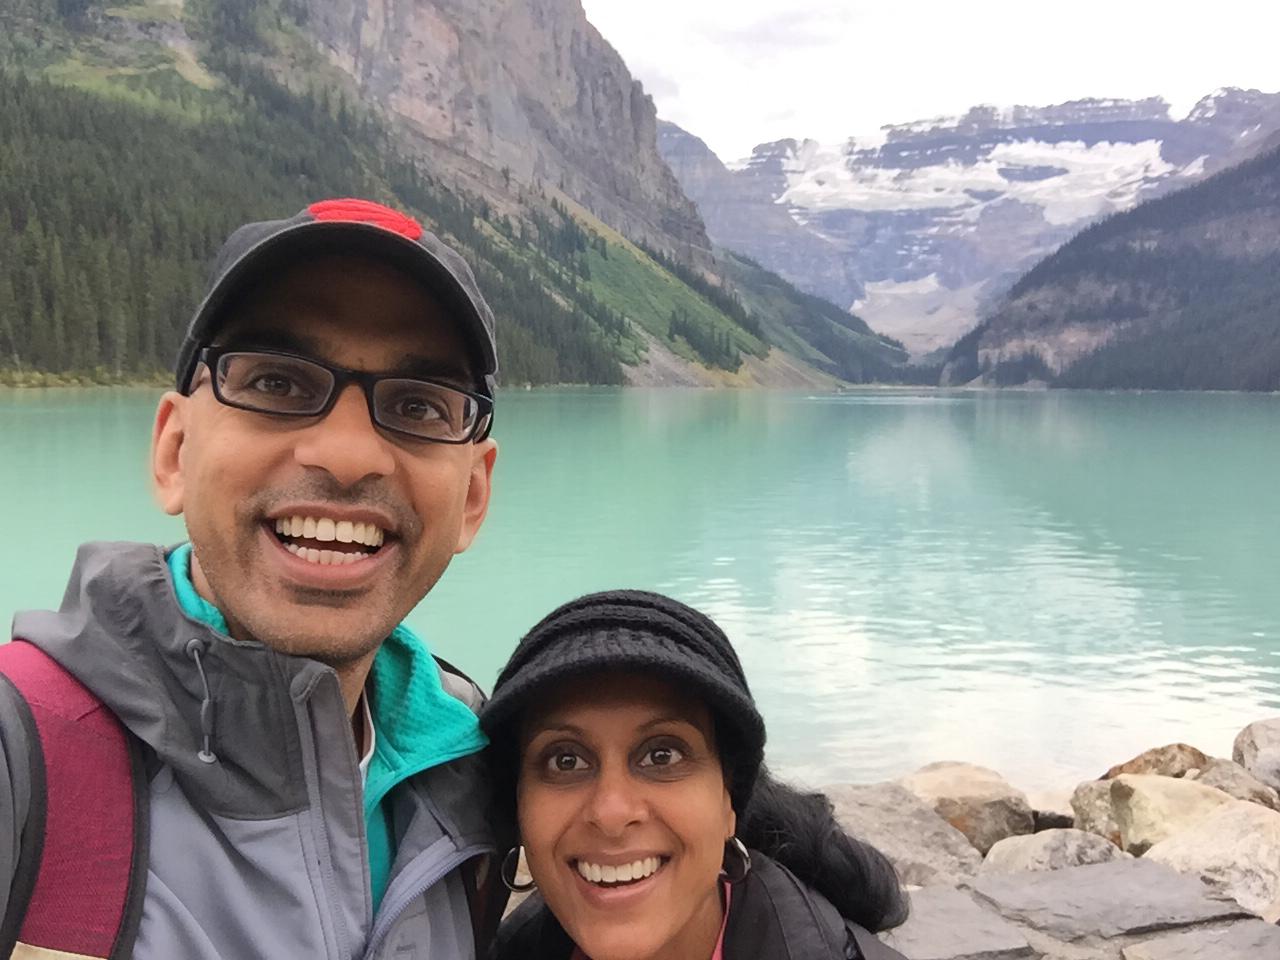
I didn’t have a Peak Design Capture Clip when I went to Banff but I would have taken it if I did. If you like traveling with your DSLR, it’s an awesome tool to have. In the photo below, my husband is carrying the backpack with the DSLR attached to the Capture Clip, but I carried it as well, and I was totally comfortable. It was convenient to be hands-free but still have quick access to the camera.
I also have Peak Design’s camera strap which replaced my women-specific Joby strap. The D-ring design of both are similar. My Joby strap wore out after a lot of use and it was time to replace it. Peak Design (smartly) hooks you into their ecosystem – their set of clips and clasps so that once you’re plugged in you stick with them as those clips, clasps, straps are compatible with their various bags and carrying cases.
I know a lot of people have issues with selfie sticks but if one uses it in a way that doesn’t interfere with others I don’t have an issue with them. I bought this selfie stick tripod because my husband and I have a big height difference. I inevitably get chopped off in photos of us. This solved that problem. When we were in Banff we were often the only people at a hike or destination making it an ideal time to take our time for photos.
Medicine and First Aid Kit. Whenever hiking and traveling, in general, I always keep some pain reliever, band aids, and Neosporin in my daypack. Some places in Banff and Jasper you may need mosquito repellant especially near water when it’s raining. We had it in our car but never ended up using it.
Hand Warmers. I packed a few of these and they came in handy. It did get really cold some days and nights and these made me a little more comfy. I bought these on Amazon.
Picnic Gear Regardless of Time Of Year
- Extra bags – resealable as well as larger grocery bags to store snacks, open food packages, and trash
- Food clips and/or rubber bands to seal open food packages
- Paper plates, cups, cutlery, napkins. These came in really handy when we stopped for picnics and breaks. (pack or buy in Banff )
- Small containers for hot chocolate and sugar (see info below)
- Thermos for hot water
- Water bottle
- Tea bags (or buy there)
- Oatmeal (or buy there see more info below)
- Collapsible cooler (if it’s hot)
You definitely want to plan for having a picnic while you’re in Banff and Jasper. Once you’re out of the main town there’s not much – as in very few places to buy food or go to a restaurant.
I bought these little containers and use them pretty much whenever I travel. For Banff and Jasper, I filled them with hot chocolate powder and sugar. While we were out, after a long hike on a rainy and cold day, we really enjoyed hot cocoa with tea and cookies.
Oatmeal. If your hotel doesn’t include breakfast, and especially if you have any dietary preferences – vegetarian, vegan, gluten-free etc. sometimes I travel with instant oatmeal. Most hotels have hot water at the tea/coffee station so I fill my water bottle and take it back to the room. We had disposable coffee cups which are the perfect size and depth to cook oatmeal. We often buy fruits and nuts to eat with the oatmeal – healthy, tasty, convenient and inexpensive. As I said earlier, I had room in my luggage for picnic gear so we planned for this ahead – spoons, bowls etc. But there are places to buy this stuff in Banff town.
Bathrooms in Banff and Jasper: What To Pack
I already addressed this a bit in the non-clothes gear section, but I also wanted to have a dedicated section to talk about this. There are numerous public bathrooms throughout Banff and Jasper. At very popular and higher population areas such as Lake Louise, Lake Louise Village, Banff town, the Columbia Icefields Discovery Centre, and Johnston Canyon hike, there are modern public bathrooms with plumbing, soap, hand dryers, and multiple stalls.
At the trailheads there are bathrooms (outhouses) but they are dry toilets with toilet paper (sometimes), no sinks, no soap. I suggest that you go prepared with:
- Toilet paper
- Travel soap sheets
- Compressed towels*
- Hand sanitizer
- Microfiber towel
- Biodegradable trash bags
- Toilet seat covers
*The compressed towels have been a great add to my travel gear. They’re tiny, weigh almost nothing and perfect for washing your hands, face, or even just to use to freshen up.
Toilet Seat Covers. I think the US is the only country where toilet seat covers in public bathrooms are a thing. It’s definitely not a thing in Canada. You can buy disposable toilet seat covers on Amazon.
Going While On a Hike. There are no restrooms on the hikes – only at the trailheads. If you’re out on the trail and you just have to go, then follow the principal – leave no trace. Cover/bury your waste and these biodegradable trash bags may come in handy.
What To Pack In Your Car + Inclement Weather
It rains often in Banff and Jasper. We were surprised that the weekend following Labor Day, there were high chances of rain. We wore rain repellant gear – pants, jackets with hoods, and we had a cover for our day pack. We packed a whole extra change of clothes in our car (including underwear and socks, as being in wet clothes, sucks!), just in case we got stuck in a downpour. That way we could change when we got back to our car (which had tinted windows). We also each packed an extra pair of shoes and bags to put them in, just in case our hiking boots became super muddy – to avoid bringing all of that into our rental car.
We also packed:
- a couple of microfiber towels
- bags to store the wet clothes
- two separate bags for wet shoes
- a separate bag for the microfiber towels, which would be wet after use. We didn’t want to put them with the wet clothes, to keep them clean in case we needed them throughout the day.
We ended up not using the bag for the towels. Instead we laid the towels out on the back seat of the car to dry. Be careful though. You never know if some of the color from the towel will rub off onto the seat of the car. - rain cover for the DSLR, so we could still use it even if it was raining
- extra hair ties
- I also had my travel hair brush. I have waist length hair and after a long hike…plus wet, it gets tangled.
ProTip: Make sure to remove wet items from the car, otherwise it will stink up the car.
Pro ProTip: Once you’re changed and nice and dry, after a cold and rainy hike, it’s kinda nice to have a warm beverage and snacks. Before we would set off for the day I put very hot water in my Zojirushi thermos and also packed tea bags and chai packets along with some cookies, paper cups and plates (not plastic) and napkins. Once we were changed and settled, I busted out the tea and cookies and my husband thought I was a travel genius. It was a nice comfy treat that we enjoyed with the gorgeous wilderness in the background! I also packed a few extra, gallon size ziploc bags, and food clips for our trash and any open food.
The Zojirushi thermos is awesome! It keeps your hot beverages hot and your cold beverages cold – all day.
Sling/Purse. During hikes I had my daypack backpack but we went straight to town afterwards for dinner and I didn’t want to carry my daypack inside the restaurants and shops. So I kept my sling in the car so I could quickly transition.
My favorite slings right now are the Sherpani Pike and the Osprey Daylite. Unfortunately I don’t think the Sherpani Pike is available anymore but this one on Amazon is a dup. The Osprey Daylite would also be nice for walking around Banff town. The only thing I don’t like about it is there’s no water bottle pocket. I wrote an article about slings for lefties, with more in depth reviews of 3 different slings.
Tech Gear
Cameras, Gimbals and Selfie Sticks
Canada has the same type of outlets and on the same voltage (110v) as the US. So if you’re traveling from the US or have US devices, you won’t need adapters. If you want to understand more about outlets and compatibility check out this great Skyscanner article.
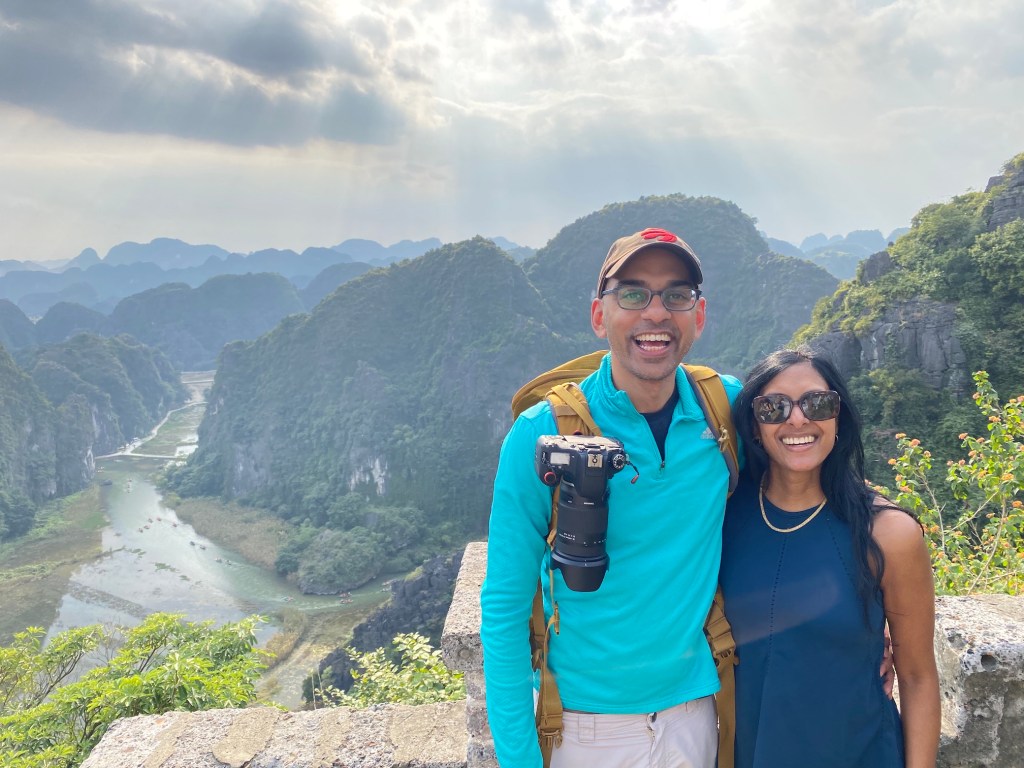
Let’s talk about cameras. I took my crop sensor DSLR to Banff. Even though a crop sensor DSLR is less bulky compared to a full frame camera, it’s still bulky. But the Peak Design Capture Clip is a very handy tool to carry it with ease. The benefit of the DSLR was being able to zoom in to capture shots of wildlife. In the photo below, you can see the Capture Clip at work. My husband and I both carried it and it was easy and comfortable.
The DJI OM gimbals are a great selfie stick and stabilizing tool for photos and videos. These gimbals are also very travel friendly.
Of course Go Pros are a good choice. And for something ultra portable (and pricey) the DJI Osmo Pocket 3 or Insta 360.
In terms of selfie sticks if you have a Magsafe phone this is a user-friendly one. The only thing is the bluetooth connection can be finicky. But the selfie stick is light and portable so a great travel tool.


Portable Battery For Phone. I have been using the iwalk battery pack for a few years. I love that I can charge my phone and use it – be on the go – at the same time. We always travel with these – small, user-friendly.
Tech Gear For Your Hotel and Car
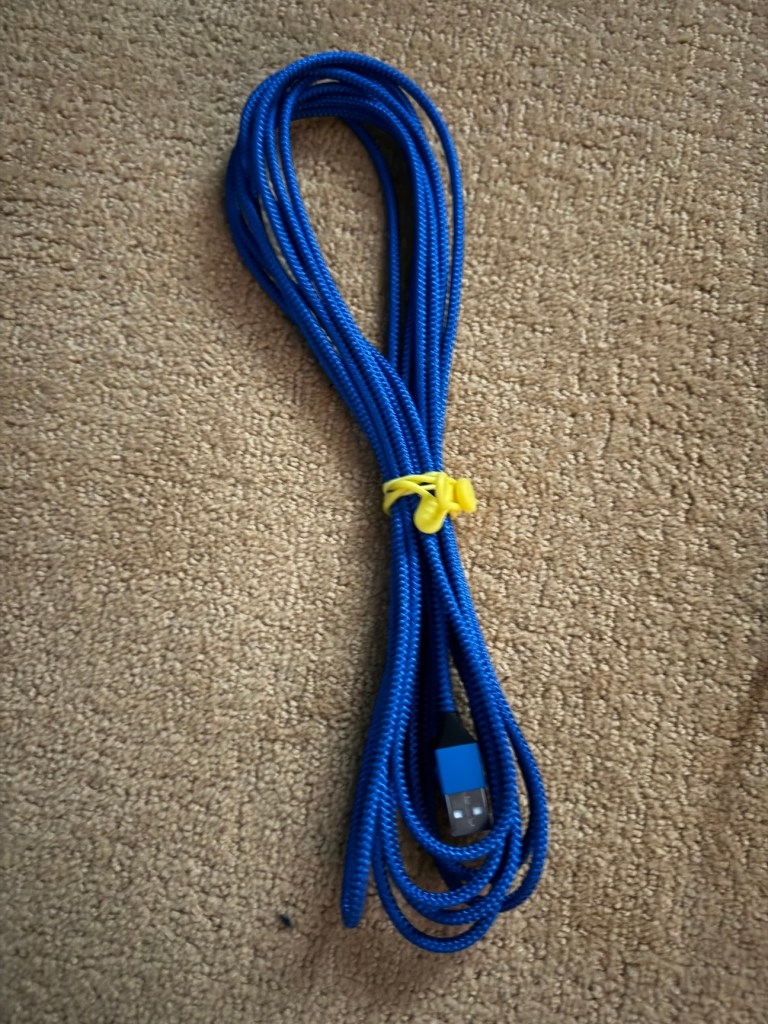
Long Cables. I bought long charging cords for my phone and tablet at the end of 2023 and have found them to be a fantastic addition to my travel tech kit.
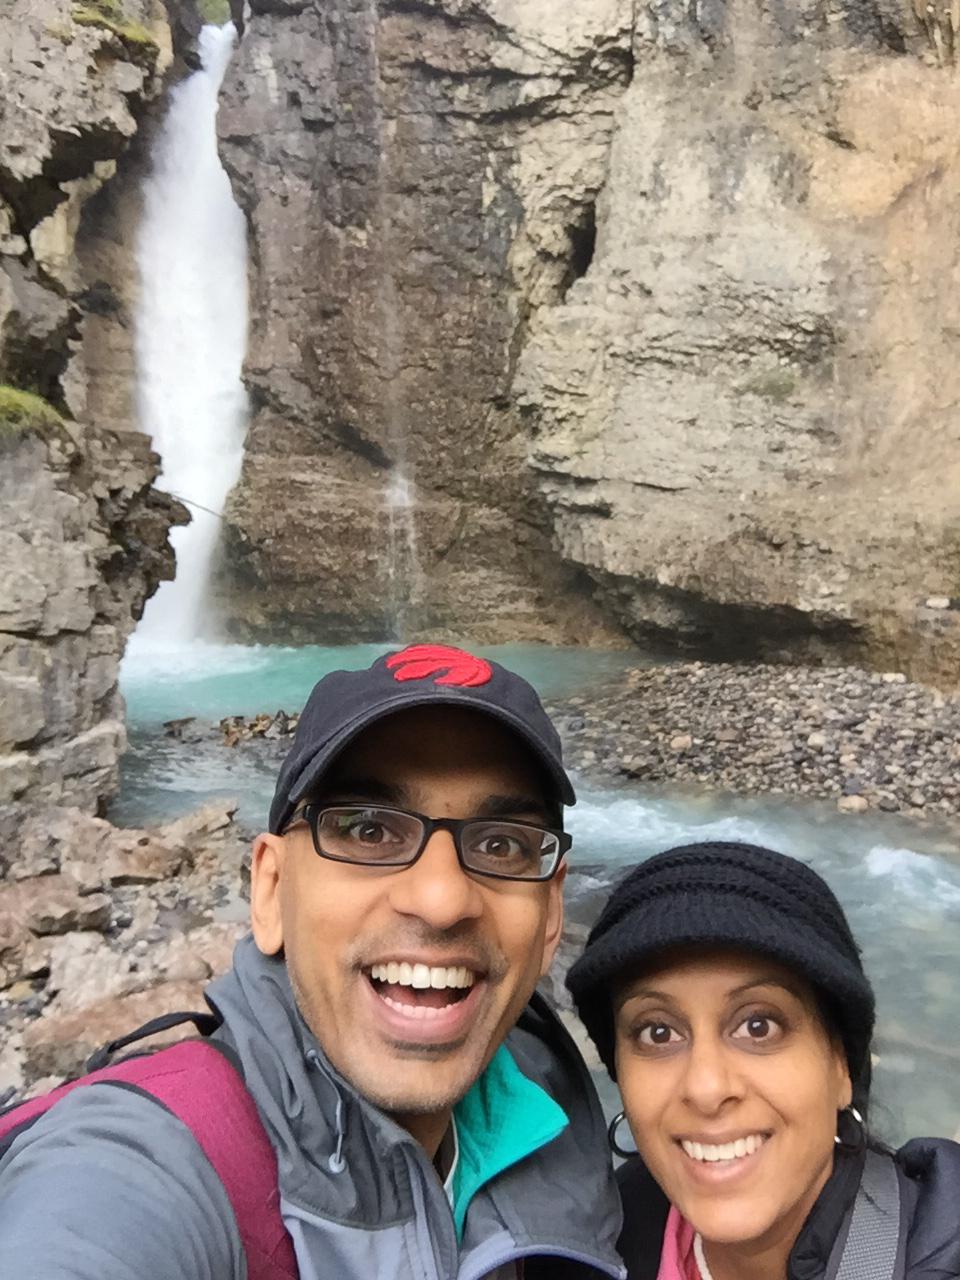
Scenario We Can Pretty Much All Relate To. It’s night time. You’re laying in bed, winding down after a fun and memorable day at a 4 tiered waterfall with the most incredible azure-colored water you’ve ever seen. You’re scrolling through the gazillion photos you took. Your phone is on its last legs of battery, so naturally, you want to plug it in – while scrolling…but the outlet is like 10 feet away….and your charging cord is not long enough. SO annoying! …
Enter long charging cords. I have seen 6, 10 and 12 feet ones on Amazon. Whether you’re staying in an older boutique hotel, an AirBnB or a hostel, you’ll be ready for whatever type of setup the accommodation has. Ability to lay in bed and scroll and charge at the same time won’t be something you even think about.
ProTip for long cords. They can get cumbersome to pack. I bought these wire organizers and they help me stay organized. These have a ‘button’ that’s very easy to clasp and unclasp. Velcro ones are a pain because they stick to everything – clothes, bags, etc. and they’re cumbersome to clasp and unclasp.
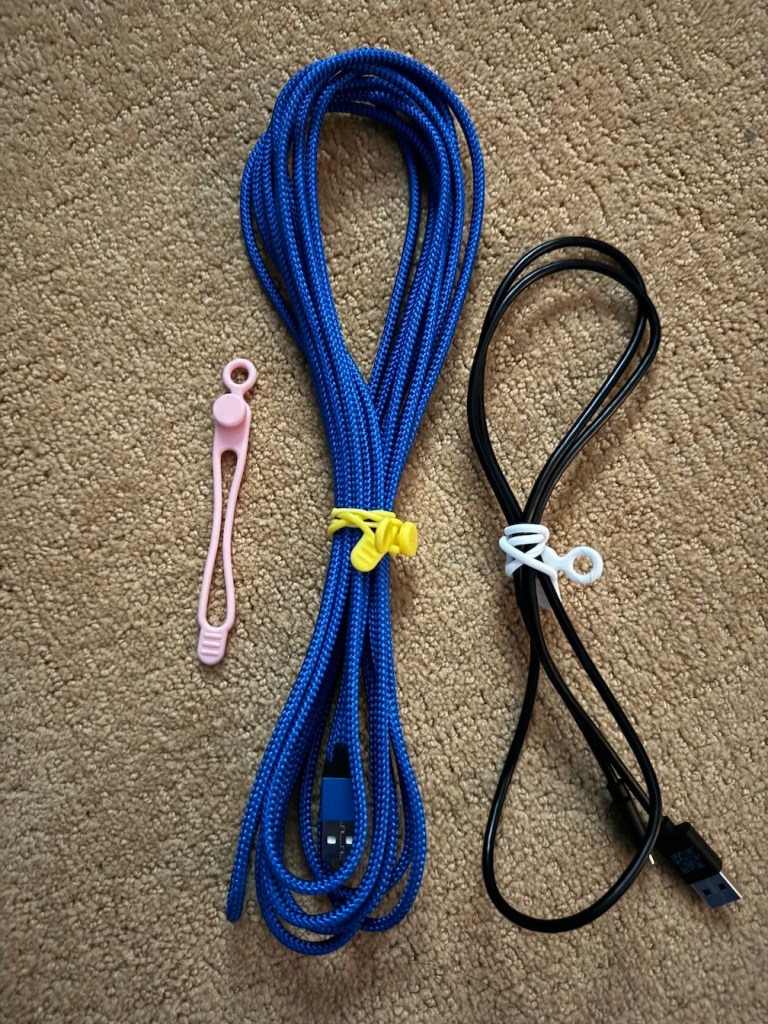
I liked these magnetic ones but after reading multiple reviews that said you have to fight with it to get the magnet to unstick, I thought ‘nah’.
Travel Power Strip. This travel power strip is a great addition to my travel tech kit as well as it’s light and compact. Like many people, we end up traveling with a fair number of devices and it becomes a challenge to charge all of them if the accommodation only has 1 power outlet.
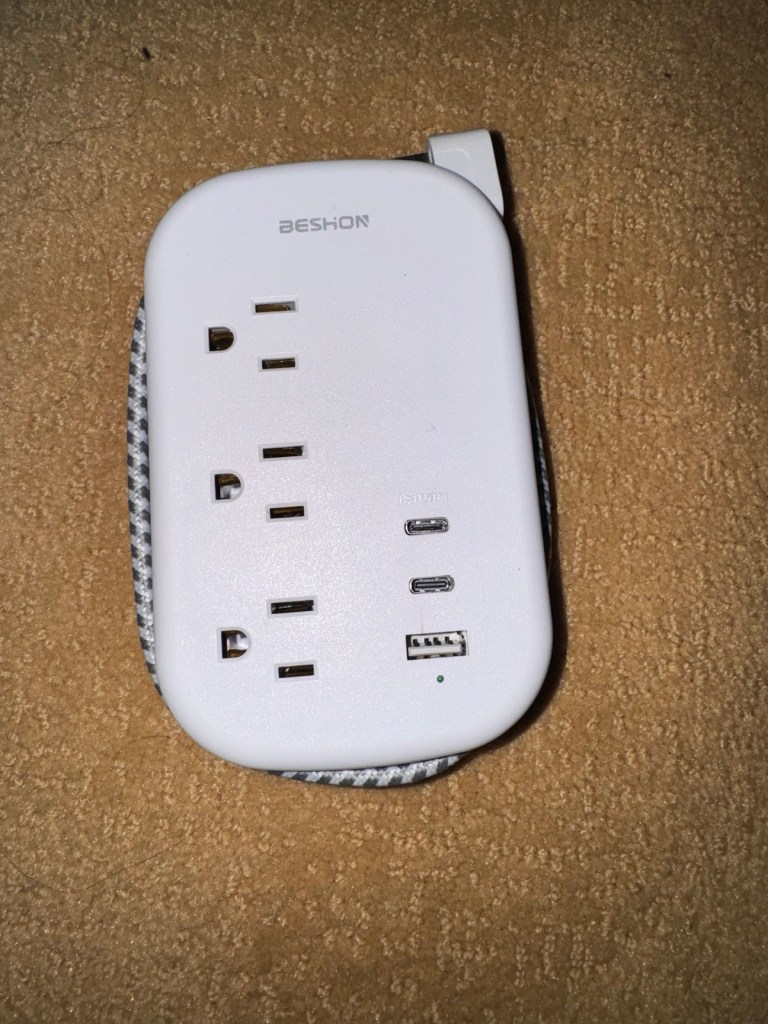
There are various travel power strips out there. This donut shaped power strip is popular, but I opted for this more rectangular one because the battery cradle for my DSLR fits better.
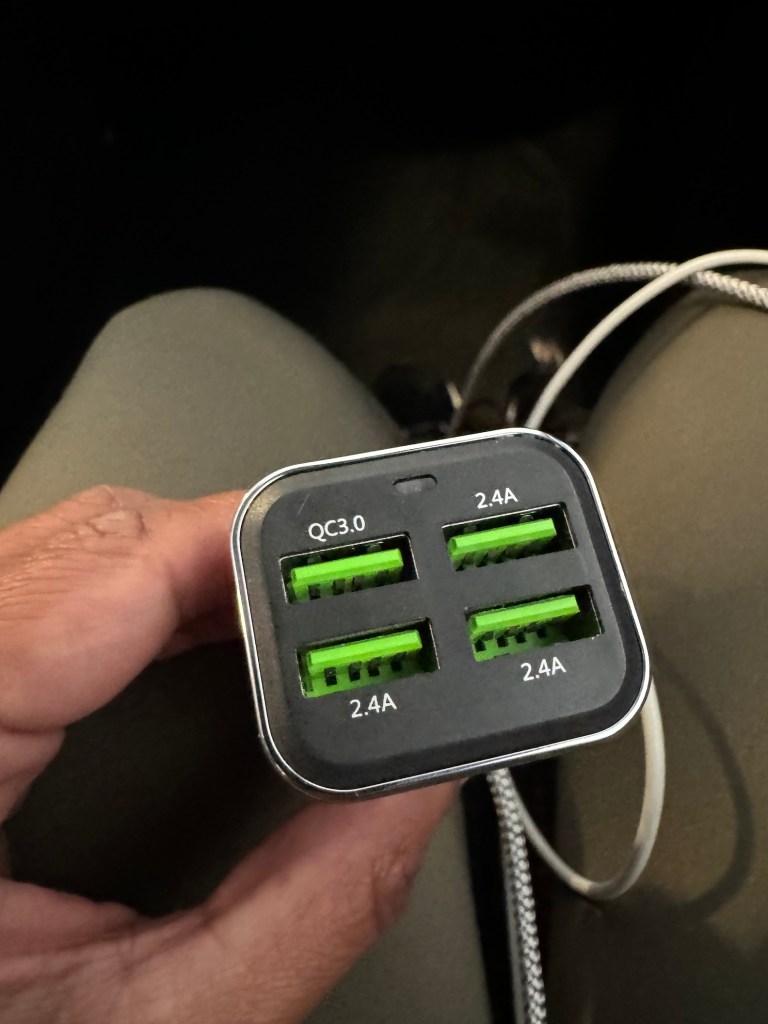
Multiport USB A Wall Charger brick. These multiport USB charging bricks are handy to have in your tech pouch as well. I can easily charge up to 4 devices simultaneously — and what a game changer. Now, I don’t think about where/how I am going to charge my devices anymore. These bricks are small and light – perfect for travel.


Multiport Car Charging Port. This will allow you to plug in multiple devices simultaneously. But don’t forget to take other charging chords such as USB-C to USB-C or USB-C to lightning for older iPhones, as many rental cars have these setups.
Wiz Gear Magnetic Phone Mount. You’re probably going to use a map app during your time in Banff and Jasper. Whenever we’re in a destination where we are renting a car, we travel with our Wiz Gear magnetic phone mount. It’s portable and very light so easy to travel with. Just don’t forget to remove it, when you return your rental car!
Tech Gear For The Airport and Plane
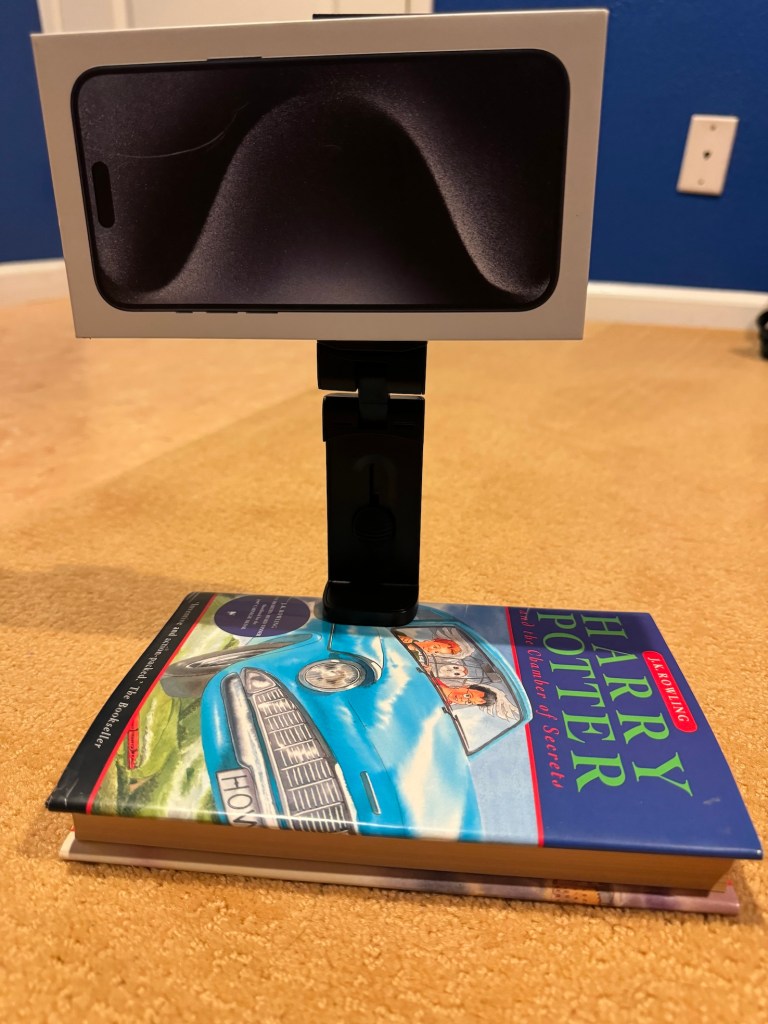
This phone mount/stand let’s you enjoy movies and videos on the plane – at eye level, so you avoid straining your neck. I mounted it to a book to replicate a tray table and used the iPhone box to demonstrate the phone. You can adjust its angle, and it swivels.
This USB hub, below, might be overkill for some but it’s super light and portable and I have found it useful in my travels, especially when the plane seat only has 1 USB port vs. a whole outlet. On long flights and being prepared for the unknown, this comes in handy. For example once my USB port wasn’t working but my husband’s was so we used this and all of a sudden we turned one port into 4. It’s very light and small, so convenient to travel with.
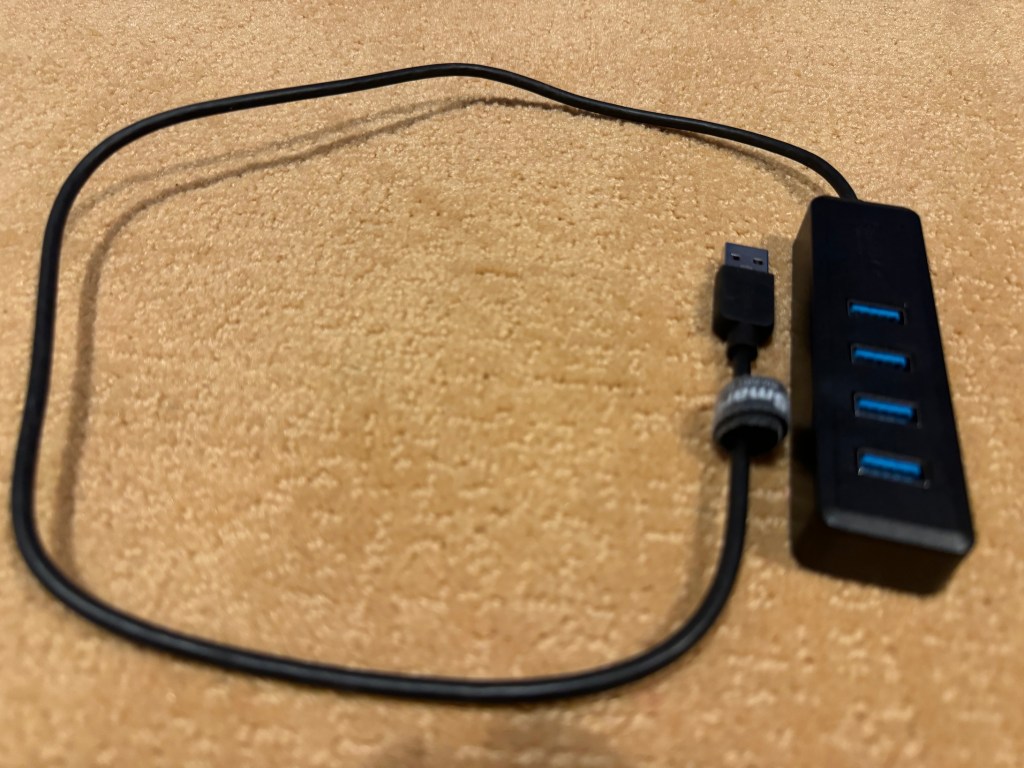
ProTip: I keep the charging brick, the USB hub and the portable battery, in my personal item so that I can access them easily at the airport and throughout the plane journey. If there are outlets at the airport as well as on the plane, then you can keep your devices charged.
Summary
In this article: Women’s Guide to Packing for Banff and Jasper National Parks in September: More Than Just Clothes, we discussed what to pack so you are prepared for day trips, rain, picnics, bathroom facilities, tech gear and what to wear.
I hope the info was helpful! And if you want to revisit any topic within the article, you can jump to it from the links below.
By the way, the products I link to are based on my honest, own experience. There are no affiliate links and I don’t receive any sort of compensation. Not that there’s anything wrong with affiliate links, but I write this blog because I enjoy writing about my travels and sharing tips with others.
I hope your trip to Banff and Jasper National Parks is wonderful!
- Clothing List
- Gear List
- What To Pack in a Day Pack
- Food and Picnic Gear
- Bathrooms in Banff and Jasper
- What to Pack in Your Car + Weather
- Tech Gear
You might like my article on vegan and vegetarian food in Banff as well!
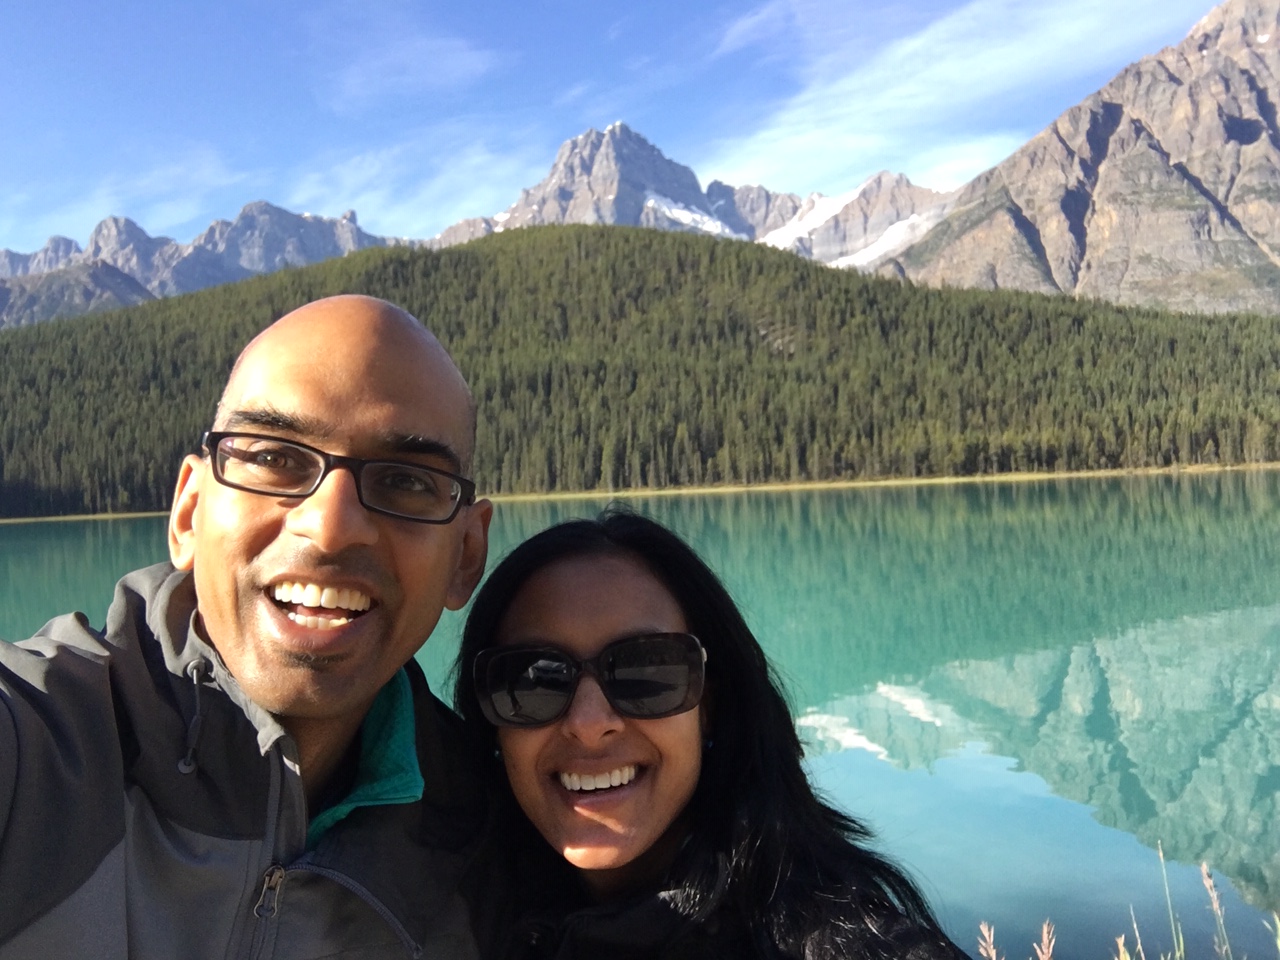
Some Of Our Favorite Photos
From Banff + Jasper National Parks


Some of our Other Articles You Might Like:
Vegan or Vegetarian in Banff
Mountain Gorillas in Uganda: A Photo Article
Petite Womens Guide To Packing for a Safari
Womens Guide to Packing for Costa Rica (applicable to Belize as well)

Heading to Banff in a week and this was really helpful. Thank you!
LikeLiked by 1 person
Thank you so much for your indepth packing list! Super helpful; I appreciate all the extra pro-tips. Thanks again
LikeLiked by 1 person
Hello! I am so happy that I found you! I too am 4’11” and it is so nice to find another woman who has the same challenges when it comes to photography etc. Carrying pro level camera equipment is something I must be very careful about. Would you be able to recommend a strap for my camera that is comfortable and not hot? I have a new full frame and don’t wish to use the strap that came with it. Any suggestions would be greatly appreciated. Thanks you so much! Happy travels!
LikeLiked by 1 person
Hi Carol, I’m so glad the info in the blog is helpful to you! I bought the Peak Design strap last year and I really like it. It adjusts easily, to the size I need and keeps my camera hugging my person so it’s not swiveling around. Regarding the hot part, if it’s a hot environment it’s still going to get a bit hot but I have found it to still be comfortable.
I also like the Peak Design Capture Clip. With the strap and clip I’m prepared for various scenarios. I hope this helps!
LikeLike
Hi Samta!
I looked into Peak Design and see two styles. One is “Slide” and one is “Slide Light”. Do you have a preference? Thank you so much for your help. It is greatly appreciated.
Carol Warren
null
LikeLike
Hi Carol, I have the Slide Lite and prefer that for my small frame AND because I use a crop sensor DSLR (lighter equipment). If you are using mostly heavier/bulkier camera equipment – I’d suggest that if you can, try-on each to see which is better for you as it’s a tougher choice – you need a bulkier strap for bigger gear but comfortable for your small frame.
LikeLike
That’s a great idea. I’ll probably order both from B &H and then decide. I am spoiled by my previous light weight set up- Olympus micro four thirds. But my needs have changed and the Sony mirrorless full frames are not that much heavier. But I will be taking care with the weight of the lenses.
I wish to thank you so very much for answering my questions. No one understands a petite like another petite! I love following you on your blog. Of course my favorite topics would be your photography journey and clothing!
Many warm wishes to you and yours for a happy, healthy and blessed New Year!
Carol Warren
null
LikeLike